Sunday, August 26, 2007

Bottle"Toe"ing

(Aug 19) It's Sunday morning. Summer is watching Boz - her favorite. Adam is washing cars - his favorite. And I'm scrapbooking - my favorite! Kathy is here also, enjoying a rare Sunday off. She is "retrospecting" as she calls it. When she's caught up on her other scrapbooks, she goes back to pix from high school. "I may have to run home to get more," she says. Oh, if only we were all as accomplished!

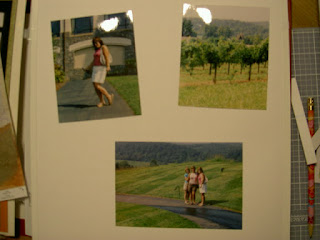
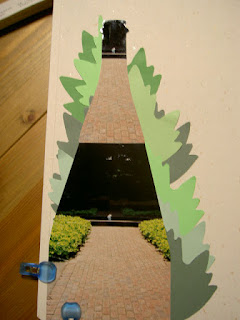
We had a cookout yesterday for Adam's birthday. As customary after we entertain, I get my stash out of "hiding" again. I go through my pix and separate the next group, which is of the Winery Tour & Tasting. I separate these pix into four groups and plan approximately 3 - 4 per page. The first group is arriving at the Winery. One pic is of the fountain in front, which is kind of drab (not exactly Old Faithful here). So, I'm thinking of turning it, along with one of its twins, into a border of sorts or cropping the pictures along the lines of convergence (also known as orthogonals). (image 1)
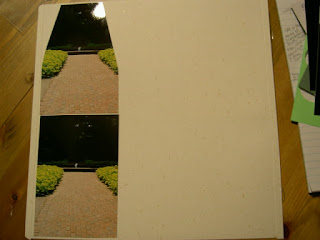
Image 1
Inspiration strikes me and I think the fountain bubbling up mimics a bottle of bubbly being uncorked, so I search for ways to turn my pic into the shape of a wine bottle. I think of some of the cutting patterns I have. They are in a basket on the buffet. I set my laptop on the basket earlier, so I grab the handle of my laptop case without checking to make sure the bottom flap is fastened. It isn't. Before I can react, the laptop drops out of the case and lands squarely on my middle toe on my left foot. OUCH! I try to refrain from cursing and simultaneously pray that the laptop is not broken or altered in any way. I get some ice on my toe and take a short break from scrapping (image 2).
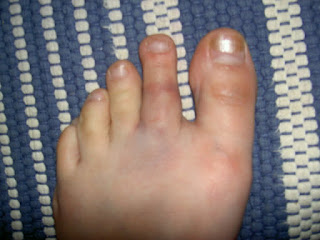
Image 2
"All in the name of scrapbooking," Kathy says, laughing. "Yes," I concur, "creativity comes with a price." While I'm nursing my toe, Kathy suggests I use a piece of background paper with a wine bottle on it, trace the outline on a thin piece of paper, then use it as a pattern to cut out the shape onto my picture. I work on this while the ice rests on my toe. The outcome is really better than I expected (image 3). Unfortunately, I can't say the same for my toe.
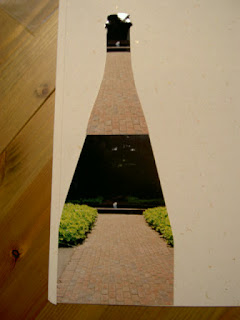
Image 3


We take a lunch break (cookout leftovers!). Adam gets ready and leaves for work, and I put Summer down for a nap then get back to scrapbooking. I decide to put some type of background behind the "bottle" and I'm sure I want it to be green, so I rifle through my stash of paper and find three shades that would work. However, I don't want the background to just be an outline of the bottle, so I think I'm going to try to outline the shapes of leaves to mimic the plants in the picture. Fortunately, I have a stencil for this that I received as a giveaway at a previous CM event, so I get to work.


It takes me quite a while to cut the leaves and arrange them in a natural fashion. To get them just right, I lay them all down and clip the bottom of the picture bottle to my page with the Multipurpose Clips so it remains still. I mark with a pencil on the page where each leaf will rest and number them in the order of adhesion. Right about this time, Kathy leaves to go to Wegman's with a friend in Owings Mills. "Hope you get done before Summer wakes up. See ya Wednesday for Crop Club," she says.


Once I have the order worked out, I adhere everything to the page with Tape Runner. I add a few foam dots under a few of the leaves to give the border some relief. It's not perfect, but I achieve the desired effect (image 4).image 4

Now that that is finished, I turn my attention to the rest of the page. I have an image from one of my brochures that I want to use here. I've already cut that out with the Multipurpose Scissors so I play with the layout a bit. I really don't want to cut up the piece from the brochure anymore so I try to get it to wrap around the "bottle" and the leaves. A bit of the edge is still visible behind the leaves and I want it to appear more seamless, so I cut an edge from one of the leaf outlines and plan to paste that on at the end (images 5 + 6).
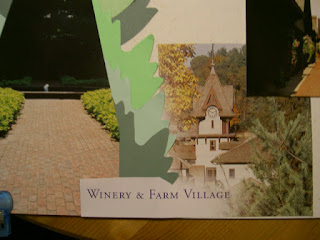
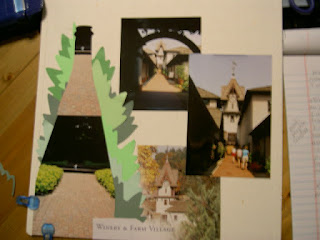
image 6image 5
I consider rounding the corners of my photos using the Corner Rounder, but only if I don't mat them. I test a mat behind the second pic and quickly realize that it will overlap too much with the image from the brochure. Summer's awake so I break and will pick up later this evening.

Summer's now asleep for the night and the dishes are done, so I return to the page. While I was giving Summer her bath this evening, I changed my mind about putting the cutout from the brochure on this page because I remembered I had a black and white postcard to use with the Winery pics. It will fit nicely with the cutout and a journal box. That leaves me with two pictures, room to do bubbles at the top and some journaling.

I work on the bubbles first. I cut a strip of French Vanilla paper and punch bubblesd using the Bubble Maker on the left side of the strip. Then, I apply Tape Runner around the holes and affix scraps of Fog paper to the back. This gives the allusion that the bottle has just been opened (image 7).
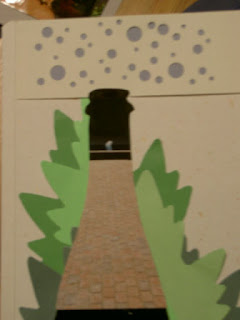
Image 7
I decide to mat the bottom photo and add a journaling box at the top from Cottage Storybox. I jot down a couple of captions on teh box with the Patina Metallic Pen. (I tested two other green colors but like Patina best.) I adhere everything to the page, wipe down the pix with the polishing cloth, slide on a Page Protector and done (image 8)!
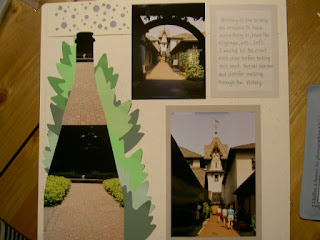
Image 8

Tuesday, August 21, 2007

Mystery Border

Image 1
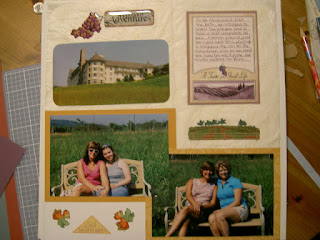
(Saturday, Aug 11) I work on these next pages together as two-page spread. I layout the photos and postcard in rough arrangements for each page (images 1 and 2).

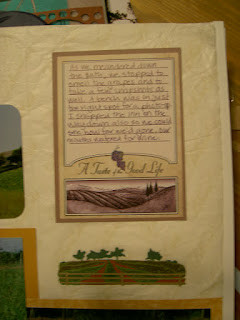
Image 2I make a few quick mental notes: use the epoxy sticker "Vineyard Adventures" as a title and use the postcard for page two, use the vineyard 3-D sticker as an accent, use the "A Taste of the Good Life" sticker as journaling box for the first page, use the blurb on the back of the postcard as journaling for page two.


Image 3For the first half of the spread, I try three colors of photo mats before ultimately deciding that maize makes the pictures pop moreso than the other two colors (image 3). However, it's late and my eyes are getting heavy, so I must go to sleep.


(Sunday, Aug 12) Uncle Sal, Aunt Tracey, Josh and Stacey came over earlier today. Tracey was showing off the pictures she took during her trip to Europe (Italy, Greece, Turkey, etc.). Stacey was seeking succor on an embellishment for her save the wedding date cards. After visiting with them and putting Summer to sleep for the night, I steal a little more time to work on the Biltmore album. Mom, my ever-faithful scrapbooking companion, is here also.


Picking up where I left off, I decide to utitlize some more of the Biltmore tissue paper for part of the background of at least one half of these pages. I also think I might round the corners of the pic of the Inn with the corner rounder. With my plan roughly in place for page one, I turn my attention to page two.

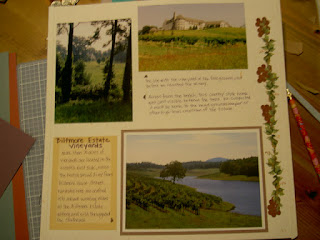
Image 4Since I'm using a postcard on this page, I want to write the postcard description on a journaling box from from Cottage storybox. I'll put this to the left of the postcard because I want to do captions for the two photos. In keeping with the color scheme of page one, I choose a maize journaling box (image 4).


Mom is ogling the pages she has done. "I'm so proud of these," she says. "You should be," I say, "You've worked very hard on them." The pages are particularly gratifying for her because of the anticipation she's built up over the last few months of doing them.


I know I need to hand cut a mat for the postcard. It's slightly bigger than a photograph and the storybox mats aren't quite big enough. Adding a mat to the postcard will lift it off the page a bit and keep the eye from wandering off the page. When selecting a color for a mat, I've found it's usually best to select a subtle color from the image to bring it out. This allows the image to pop off the page a bit more. Now, if it clashes too much with the overall color scheme, then try the next best hue. I select a sheet of paper from the Colonial paper pack. The easiest way I've found to cut paper to perfectly fit an image is to mark it with a pencil. A pencil is my one indispensible tool when I'm scrapbooking. Primarily, I use a pencil to mark positions on a page and to measure cuts and, of course, to make notes. Pencil marks are easily erased, leaving the page and cutouts pristine. Small caveat: I do not recommend using a standard No. 2 pencil or pen to write on the back of photos. Over time, this will deterioriate pictures. Instead use a photo labeling pencil.


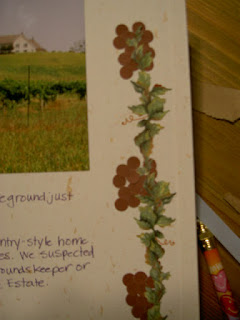
An idea for a cute border is working itself out in my mind. I found a long sticker of leaves in my stash that would correspond well to the leaves I'm planning for page one. As for the other part of the border, I'll have to leave you in suspense. Hey, gotta keep you reading!


Image 5I adhere everything to page one, including the stickers, but because the journaling box has a glossy finish, I have to wait for the ink to dry before applying tape runner to the back (image 5). Meanwhile, I make punches for my mystery border and adhere them to the page by first applying tape runner to the page, then placing the punch-outs over the adhesive. This saves me from trying to apply adhesive to each little punch-out.


I adhere my pictures to the page, then commence with the captions, using Journaltopia Writing Guide to ensure my writing is straight. I choose the purple fine-tip pen to write the captions. Mom suggests I add little twigs to my mystery border with a pen for an added effect. I test all the green colors I have on a piece of scrap paper, but none of them are the right color. I decide to use brown instead.


Image 6I adhere the now-dry journal box to page one. Then slide the page protectors on both pages, and I'm done! (images 6 and 7) Not a moment too soon either - Mom is packing up her stuff which is a sure sign it's bedtime!

Image 7


Image 8The grape vine border mystery revealed: I used an average, ordinary hole punch to punch out "grapes" from a scrap piece of paper. Before removing the leafy vine sticker from its backing, I hold it up to the page about where I want to adhere it. Using my handy, dandy pencil, I mark on the page where the "grapes" will be most visible. Over the pencil marks, I put tape runner onto the page, then apply my punched out "grapes" over the adhesive. Next, I added the leafy vine sticker to the page followed by squiggly twigs with my brown fine-tip pen (retired product). (Image 8)

Monday, August 13, 2007

Vine Design

The School Times workshop went well today. I had to take a break from the Biltmore album to complete the school album for Summer (and the others attending the workshop). I'm excited to have that album ready for adding pictures when the time comes, which is only 3 years away!

After clean up and and some time spent with Summer before her bath and bedtime, I'm ready to continue working on the Biltmore album. Mom - my official scrapbooking buddy - is here with me. She is no longer a virgin scrapbooker, and, after spending many months organizing her stash, she completed 4 more pages today during the crop! "You are officially hooked," I say. "I watched you grazing around our scrapbooking table, your mental wheels turning with ideas and anticipation for applying them to your next pages." She quickly agrees, and, with that, we sit down to start another session.

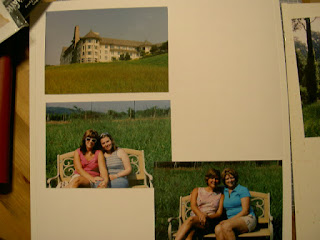
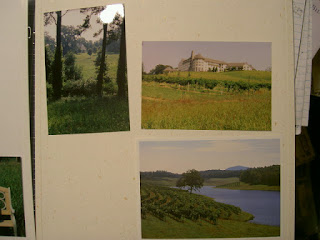
For the next page in the Biltmore album, I have picture choices to make. There are nine pictures in this group, which include our walk from the Inn down to the Winery after breakfast. I anticipate that these pictures will probably comprise the next three pages. There is one duplicate, however. When using my 35 mm camera, I sometimes take two pictures of the last exposure on a roll, not only in the event it is one of those half-exposed frames but also to help me keep the rolls in the proper order.

I might be able to get all of this pictures into two pages. It depends on if I do any cropping or not, which generally if I do, it is not much. I start with the first three pictures and check my stash of memorabilia. I consider a postcard of the 70-acre vineyard as well as an image of a breakfast table from one of my brochures. Turning my attention to stickers and other embellishments, I note that I have a 3-D sticker of a vineyard, a background paper with a vineyard that I could use as background, and a couple epoxy stickers with appropriate phrases. I group all of these items together before I start the page much like Candice Olsen from Divine Design (on HGTV) collects all of her inspirations, textiles, etc. into a wire basket before sketching anything.

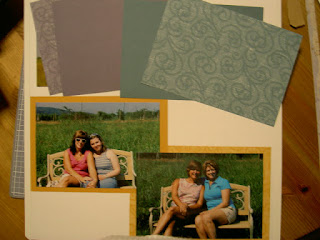
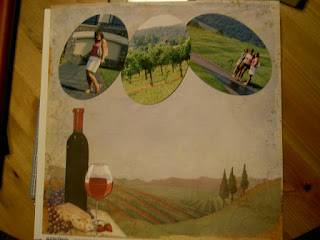
Image 1With the personal trimmer, I crop a little of my photos out, not much, just a little excess sky and ground (image 1). I consider ovaling two of the pictures with the oval cutting patterns, and, for a brief moment, think that a trio of these would make a nice "cluster" of grapes. I fear that the grandeur of the landscape might be lost if I do that. Image 2After a bit of contemplating, I decide to go for it anyway because it would be a nice effect. If I don't like it, I reason, I have two more copies of each picture, and I can start over! After completing the oval cuts with the custom cutting system mat and blades, I decide it was a good move (image 2).

At that moment, Mom blurts, "Oh no, I made a mistake!" In filling a family tree page, she incorrectly wrote a name in one of the spaces. Her page is a light green color, so the write-again correction paper won't work. Thinking for a minute, I say, "You can cut some green paper - a slightly darker shade than the page would be fine - the same shape as the openings, and place the strips over the spaces for all the male names. This way, it would look uniform and like you intended to do it that way." She likes this idea, so we hunt for an appropriate color of paper. I have some in my scraps stash, so she measures and uses that. "I have multitude of solutions up my sleeve," I say, "only because I've made so many myself!"

Back to my page, I trim the background paper using the 12-inch straight trimmer and custom cutting system mat and blades. I start thinking layout again and wonder how I can mimick stems and leaves for my "grape" pictures using paper and pen. I check my stash of green and brown paper. I have a sheet of green that could work for a leaf or two, but I quickly determine that the leaf would obscure the pictures too much, so I nix the leaves idea. The branch idea would work well, though, so I hand tear a strip of paper-bag brown paper to place at the top of the page above the photos.

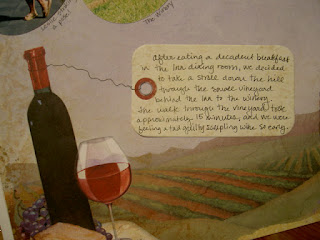
Since this page is already "busy" with the background paper, I save the other embellishments for the two upcoming pages. Now, I think journaling. I don't have much journaling to do about the actual walk, just where we'd been and where we are headed. I can make little annotations of each picture under the pictures. I find the perfect journaling box that looks like a tag but with a worn texture. I scribble my thoughts on it with a black fine-tip pen from the basic set (sadly, neither Mom nor I have sugarplum, which would have been perfect). Now, I'm ready to adhere everything.

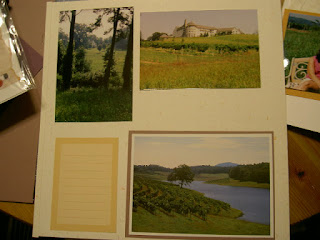
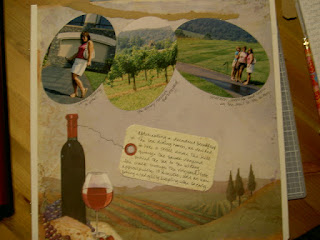
Image 3I add a string from the bottle to the tag with the black fine-tip pen. I add a few captions to my pictures and this page is history (images 3 and 4).

Aside: In the first picture, you might have noticed a slight imperfection on the Image 4reinforced edge of my white refill page. Part of it tore some day ago when something with a sticky backing accidentally landed there and I tried to remove it. To conceal the tear, I place a strip of write-again correction paper on it to hold it down and now it's barely noticeable. If you didn't notice, then my trick worked, but I still wanted to share the tip!

Thursday, August 2, 2007

Biltmore Rewind

Some of you asked me if this is where I started in the scrapbook. The answer is no, it is just where I started blogging about it. For those interested, here are the preceeding pages to the blog entry pages.


Opening Page

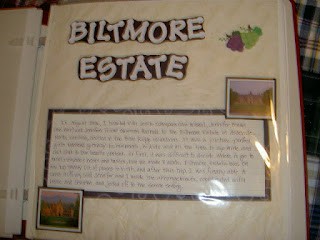
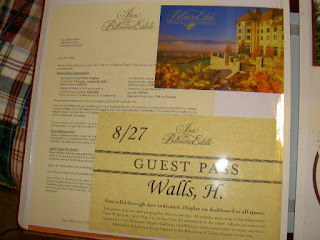
For the opening page, I wanted to keep it simple. No pictures adorn this page, since it acts as a title page. For the background, I cut to size tissue paper that the winery packed in my shopping bag at checkout. Many retail stores do this as a way of protecting merchandise once it leaves the store. It's a great memento to save from trips to use in your scrapbook later. I wrote a brief background of the trip (why I went, who I went with, etc) on white ruled paper and then mounted it on a printed sheet from the shades of purple pack. I purchased the stickers that adorn either corner of the journal box at one of Biltmore's gift shops. I created the title using some pre-cut letters and adhered them onto a solid sheet from the shades of purple pack, then cut around them. A three dimensional grapes sticker finishes off the page.


Inside Cover


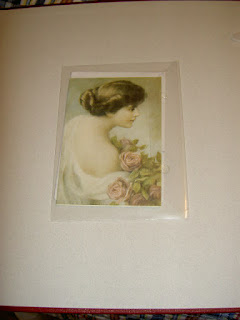
I saved a note my friend Leslie mailed to me two months prior to the trip. Since this took place before the trip, and I had nothing else to include with it on its own page, I adhered one of the plastic sleeves CM stickers come in to the inside cover of the album, and placed the note card with envelope in the sleeve. Now it is the first item in the scrapbook. I could have also used an 8 1/2 x 11 portrait sleeve or a 7 x 7 refill page to showcase this item.


Page Two

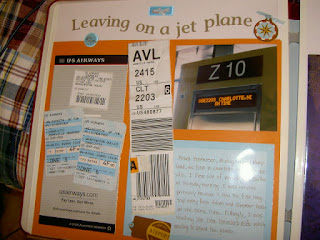
This was a really fun page to do. It was a bit challenging because I had so many elements to fit onto it. I kept the luggage tag, bag claim receipt, boarding pass jacket and boarding pass stubs from the trip. I chose an orange background paper to visually bring out the gate flight number and destination in the picture. Since there was so much space on the boarding pass jacket that didn't need to be visible on the page, I used it as a sub-background for the bag claim receipt and boarding pass stubs. I arranged all the items loosely onto the page, and started adhering everything. To get the brown airport tag at the bottom of the page positioned just right, I used my trusty pencil to mark where the eyelet would go, while everything was laid out on the page. Then, I punched the hole for the eyelet into the journaling box and attached the tag. I did all of this before writing anything on the journaling box. For the title, I used the titletopia wavy template to align the stickers. For the circle charm to the right of the title, I tied a piece of the blue tape runner strip (stuff you're left with after tape runner is used) to the charm, then used a 3-D dot to lift it off the page.


Memorabilia

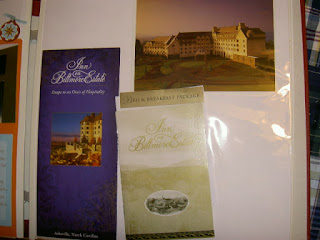
Portrait sleeves are great for storing bulky or oversized mementos that you still want to remove and look at but also include with the scrapbook. I used a 12 x 12 portrait sleeve and stored some of these mementos on both sides. Another alternative would be to use the CM sticker sleeves, adhere them to your page with the flap side facing you. However, you will still need to remove the page protector, if you've used them, to access the mementos this way. The CM sticker sleeves are also acid- and lignin-free, so they will not harm your pictures in any way.


Page Three

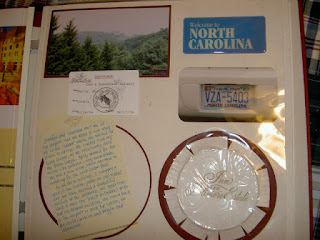
For this page, there were two pictures I wanted to use. We had a spectacular view of the Inn @ Biltmore Estate from the parking lot of the Moose Lodge (where we ate after arriving - it was the first place we stumbled upon - a fun rule to have on trips). I also snapped a picture of the license plate of our rental car as well. The mementos from this page came straight from our room at the Inn. When I stay in hotels, I take everything that even remotely resembles paper. Doing this adds to the amount of periphernalia that I bring home, but some of these treasures are wonderful accents to a scrapbook. In this case, I took the paper lids covering the glasses in our room. I also took one of the notepads as well. Notepads inevitably identify the establishment in some way, and they make excellent "journaling boxes" for a scrapbook. To get the paper lid to lay "flat" I cut it at equal intervals along the circumference. Then I used some slightly raised 3-D dots to give it some relief. I used my circle template pattern to make the circle behind it. Then (so as not to waste the paper) I used the outline of the circle to highlight my makeshift journaling box. The final memento is the guest access card they gave us during our stay. I raised this with 3-D dots as well.


Page Four


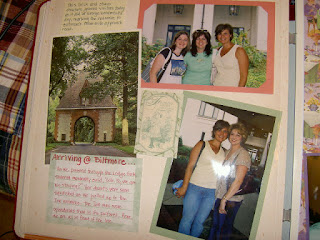
By this point, you're probably wondering if I took any photos of myself and my friends while there. Of course I did! For this page, I knew I wanted to journal about what Shannon said after we passed through the Lodge Gate, so I first staked out a spot for my journaling box. Since I didn't get any pictures of the Lodge Gate, I used one of the many postcards I purchased while there. Postcards are a great way to fill in any gaps in your scrapbook where you may have neglected to snap a photo. I wanted to make sure that the description on the back of the postcard was visible as well, I wrote it out on scrap piece of paper and placed it above the postcard. Another way to handle this, if you have room, is to photocopy the back of the postcard (darkening it, if necessary) and place that next to the front of the postcard. Incidentally, I did try this, but the text on the back is a very light green, and no matter how much I darkened it, the text just didn't show up well. If you are including postcards that you or someone else has written on in your scrapbook, I would highly recommend copying the backs. For the photo backgrounds, I used a pink and sage sheet of photo mounting paper from a now discontinued storybox. Finally, I include a sticker about friendship, raised with a couple of 3-D dots. (Friendship grows like a garden bouquet.)


Page Five

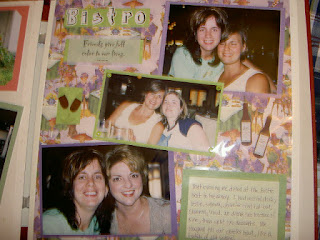
We ate at the Bistro near the winery the first night there. I found some cute background paper that features "high-society" ladies in wide-brimmed hats at some kind of tea or club event, socializing (i.e., gossiping). I thought this would go perfectly with this scrapbook. I mount the photos with purple and green mats from the Everyday storybox. On the center photo, I add four green eyelets to the corners. I use a journaling box from the same storybox. I use a piece leftover from trimming one of the mats to support a vellum accent from the Expression of Family and Friends vellum accents pack. To further embellish the page, I add wine bottle and stemware stickers to the page. The bottles are raised with 3-D dots. For the title, I use another scrap of a green mat and cut out the outline of some black letter stickers. I adhere them to the green paper with the tape runner.


Page Six


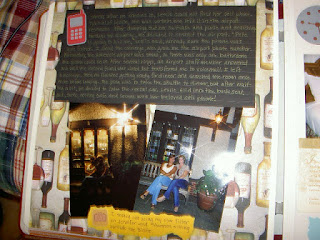
Leslie is forever misplacing things, and she didn't let us down in Asheville. No, nearly immediately after arriving, she realized she lost her cell phone. This was such a humorous part of our trip, that I wanted to devote one page to journaling about it. I used a sheet of background paper with wine bottles, flutes, etc on it. Then I cut a sheet black ruled paper (now discontinued), and began recounting the events, from the moment she realized the phone was gone to the moment we "found" the phone (it was never really lost). I cut a die-cut of a cell phone from my special machine, and accented the journaling box with it. Below that, I included two experimental photos I took using my cross-hatch filter (Jennifer and Shannon sitting outside the winery). I captioned the photos by tearing a scrap sheet of yellow from the Shades of Yellow paper pack and placing a sticker of a camera next to it.

Now you are all caught up!
Related Posts with Thumbnails