Sunday, December 21, 2008

Regret and Road Blocks

[Sunday, December 21, 2008]


The holidays are once again upon us, and, with them, the end of another year. This time of reverie conjures many mixed feelings: longing for years gone by as well as hope for years to come. If you're feeling any measure of regret, ask yourself why. When you are able to answer that question, commit to reversing it in 2009. Obviously, you cannot go back in time, but you will no doubt be presented with similar situations again. Life is too short for should-haves.

Not long ago, a mentor of mine left me with this thought, imprinted upon a small keepsake card:

"Concerning all acts of initiative and creation, there is one elementary truth the ignorance of which kills countless ideas and splendid plans: that the moment one definitely commits oneself, then providence moves too. All sorts of things occur to help one that would never otherwise have occurred." - Johann Wolfgang Von Goethe

While I haven't always admonished its creed, I refer to it daily, and remind myself that, apart from God, my future is only up to me.

In the last decade, Adam and I have both lost grandparents who are dear to us. We both regret not spending more time inquiring about their lives. We are both committing to trace more of our family trees in the coming year and filling in some of the blanks. We are each motivated for different reasons, but we both feel it's important to learn as much as we can about our roots. Armed with this knowledge, we will be able to educate our future generations via scrapbooks and heirloom-quality family trees.

With that, I wish you all a Merry Christmas and Happy New Year. I leave you with my final blog post of 2008.

[August, 24, 2008] - Happy B-day, Nana!


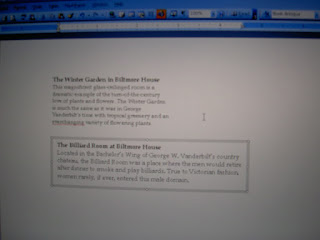
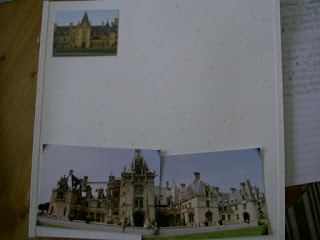
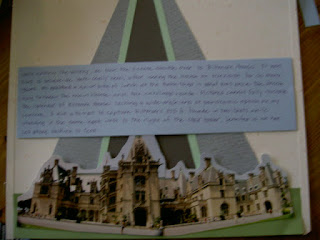
Finally moving onto the 2nd floor in Biltmore House, I need to print out a few more descriptions of the rooms on vellum. I also decide to combine the grand staircase and second floor living hall onto one page so the Vanderbilt's bedrooms occupy a two-page spread.

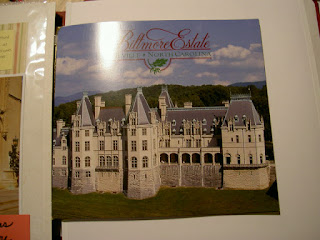
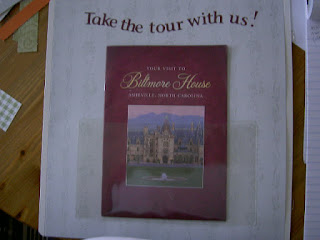
I begin the page with the elements I have, leaving room for items I'll add later, including a title and the vellum accents. (image 1)

Image 1

At this time, Adam and Summer leave for Mickey D's to grab some lunch (which we had promised her the day before). We aren't big fast-food eaters. In fact, when possible, we tend to take detours to avoid driving past those restaurants. However, at a very young age, Summer, having never visited the establishment, was omniscient about Mickey D's. I'm convinced kids are somehow programmed with this knowledge in the womb. All the unborn babies telepathically receive survival tips from earth-dwelling kids, which include the must-know details on McDonald's, Disney, Santa, etc. What's more, the knowledge is very specific. For example, rather than being cognizant about kids' meals at fast-food restaurants in general, it is typically Happy Meals at McDonald's. When have you ever heard a pre-schooler request a stop at Wendy's or Arby's? Kids whose tireless parents keep TV away from their toddlers uncannily still know about Mickey Mouse and Elmo.

Anyway, whilst Adam and Summer are off to retrieve the artery-clogging food, I open up MS Word and type the text boxes for the rest of the Biltmore House tour so they're ready for printing. I manage to fit them all on page. I'll print them out later. First, I need to trim the vellum to 8.5 x 11 so it will fit into the printer tray. I use the 12-inch straight trimmer.

Adam and Summer return from Mickey D's, so I break for lunch. (It's okay, I tell my body, you'll survive - at least today.)

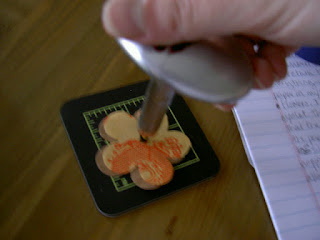
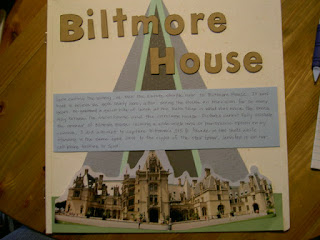
After putting Summer down for a nap and after printing the vellum accents, I turn my attention to background color. I may have mentioned this in a previous post, but it's worth repeating. If your photos or images are light, use a dark background color. Conversely, if the photos/images are dark, use a light background color. This puts the focus on your pictures and not on the background.

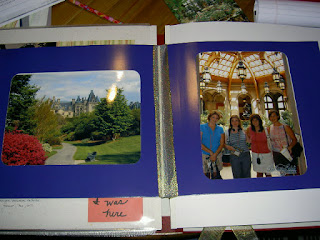
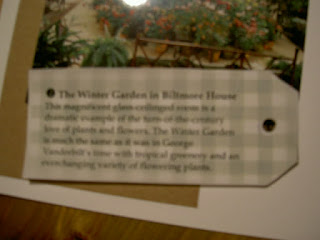
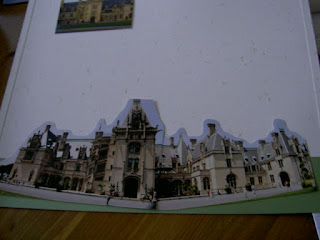
I choose black single color cardstock to charge a few images. Because I want to use black for most, I don't even bother trimming the paper. I just use the entire sheet as background. I did find an image online of the chandelier suspended in the staircase, so as soon as I print it out, I'll use it in place of the photo of the staircase exterior. I use splashes of color - peach, gold - to charge a few images on the right, but I can't adhere anything until I print the photo of the chandelier. (image 2)

Image 2

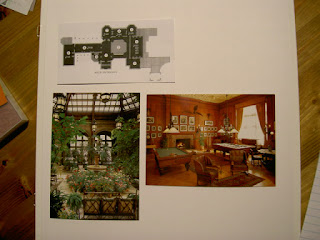
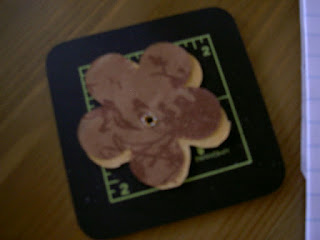
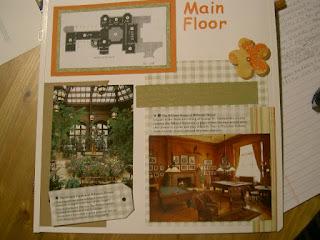
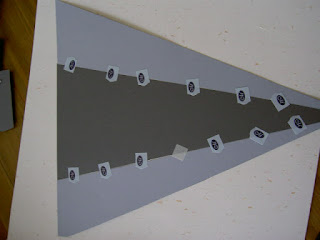
I run upstairs and run off a black/white copy and determine the printout image can't be more than 4 x 4, so most likely it'll end up 2.75 x 4. But at least I know it'll fit. I adhere the vellum with frosted splits and everything else with tape runner. I decide to raise the vellum accent under the chandelier picture but I'm not sure what color paper to use. I pull out my color wheel for guidance. By pointing the star end of the isosceles triangle at the start color (peach), I follow the other two points to their respective colors (lilac and teal). I select teal because it will throw back to the palette from my previous page. (image 3)

Image 3

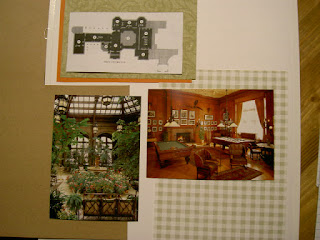
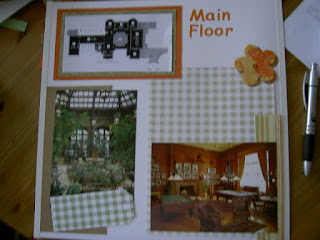
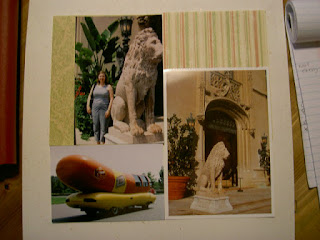
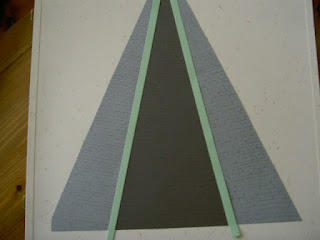
I decide to use the copper metallic round tip pen on this page because it will show well on the black paper. I pull out the journaltopia to guide my strokes. Freewriting is hit or miss. Don't sweat it if your handwriting makes the common ascent at the end or if the letters aren't exactly the same size. This contributes to the personalization of your project and contains a piece of you. (This little pep talk is as much for me as it is for you!) The result is not bad. Good but not perfect. So, sans the pic of the chandelier, this page is finito. (image 4)

Image 4
One final word, if you hit a road block because you are missing a photo or piece of memorabilia, don't let it halt all progress. Mark a space for it and scrap around it. You can fill in the hole later (even if "later" is two years from now!).

Saturday, November 8, 2008

The Rescue

[Saturday, August 23, 2008]

This morning an interesting adventure awaited us while we were out on our boat. After riding 2 miles over to Berley Cove the motor stalled. It had been idling here and there, but Adam thought we could make it. Twenty minutes and two fresh blisters later, Adam was unsuccessful at re-starting the boat. Anyone singing the Gilligan's Island theme yet?

We began drifting toward several piers, so Adam and I had to break out the orange collapsable oars. Summer wanted to row, too, but we didn't want to risk the chance that one of the oars might fall into the water and drift out of our reach. I was trying to keep Summer entertained and in the boat while rowing at the same time, but my inexperience was evident as we floated around instead of going straight.

Adam was about to radio for help when, fortuitously, a group of locals were about to launch their cabin cruiser a few feet away from us. Out of the kindness of their hearts, they offered to tow us back. We couldn't have been more grateful since the tide was rolling back in and rowing against the wind would have taken us hours if not days. We were also grateful that we had decided against going out into the bay that day due to the chop. We really would have been stranded then!

Adam rowed the boat as close to the dock as he could get while our rescuers loaded up their boat and backed it away from the dock. Adam threw them the line, and they tied it off. Adam joked that ours was their life boat. We made a bit of small talk and snapped each other's pictures, for storytelling, of course. Although Adam was slightly embarrassed, I reminded him that it could happen to anyone much like a car breaking down.


Our new friends weren't put out at all. In fact, they seemed thrilled to be sailing for purpose rather than mere leisure. They dropped us at our dock, threw us the line and sailed away. Below are some images commemorating the event.


Since we made it home safely and in time for Summer to take a nap, I reward myself with a little scrapbooking time. Still plugging away at the images from the tour of Biltmore House, I have nearly concluded the main floor. This page of the library won't take much space so I plan a border for the left side of the page. Color choice is easy: brown and cranberry single color cardstock to coordinate with postcards. I use the tearing tool to create a staggered effect on the border (image 1).


At this point, I come down with a case of cropper's block in deciding how to embellish the border. I consider making tags with the tag maker and writing one-word descriptions on them. I consider punching paisleys with the paisley maker. I consider using letters to spell a title. I search and search my stash but nothing seems brainy enough for the page. What images conjure confidence of knowledge? I ask myself. What images are indicative of learning? The brain? Spectacles? Reading lamp? Notebook and pencil? I can't think, and unlike on Nabbs Creek, I receive no rescue, so I step away.

[Sunday, August 24, 2008]


When I return to it the next morning, I find a tag in my stash that contains autumn hues of orange, red, brown and teal. I use this to journal a few sentences and anchor the border. I also discover a remnant of aqua paper to change the brown and the red under the vellum and the as-built. When I add the tag, it will unify the entire color scheme (image 2).


For the journaling, I choose the cocoa fine-tip pen, then adhere the tag to the page with 3-D dots. Finally, I attempt to create a pair of reading spectacles using the mini-circle maker and the black round- and fine-tip pens. I punch two 3/4-inch circles each of white and mediterranean single color cardstock. Then, using the black round fine-tip pen and scrap paper (to catch ink run-off), I outline the mediterranean circles in black, then with the tape runner, adhere them to the white circles, leaving a bit of the white exposed to the left. With tape runner, I adhere the double circles to the border on my page at a slight angle. With the fine-tip pen, I free draw the frames of the spectacles, then outline the frames with the round tip pen (image 3 and 4).


With that, I've logged another page. It doesn't rival the relief of being rescued from a breakdown in the middle of Nabbs Creek, but it is still one step closer to a completed album.


Sunday, September 21, 2008

A breakthrough of Dr. Phil proportions

[Tuesday, September 23, 2008]

Before I enter my latest post on the Biltmore album, I must sing the praises of a little-known scrapbooking method that has allowed me to complete a whopping 40 pages in my 2001-2002 events album the last month. Shocking, isn't it? Many of you who are familiar with the rate at which I normally complete my albums are surely impressed. The process is called the Power Layouts method. It can be described as an assembly line of sorts. Basically, it involves first culling all the elements of a page: the paper, photos, mats, journaling boxes, embellishments, etc onto a faux page (i.e., plastic with indented guides for different size pages). Following that, cutting, punching and journaling, then setting the faux page to the side to move onto the next page.


One session, I put layouts together. The next session, I paste everything down. I've found the reason why this works for me is because when I'm putting the layout together in the first step, I don't have to commit to my decisions until the next session, so I'm free to move on without second guessing! Who knew I was such a commitment-phobe!


At any rate, I highly recommend the Power Layouts method. As if on cue, CM has just introduced a new Power Layouts kit for the new true 12 x 12 and 8 x 8 sizes. It's available in the New Products section under Organizers on my website.


I'd actually started using this method early last year, but didn't get around to pasting some of the pages down because I was waiting for some pictures for the event that go in the front of the album. For some reason, I felt that I had to put the album together in consecutive order. How silly of me! It's simple enough to mark a blank page with a flag reminding myself what it's for and go back to it later! Don't let missing photos hold you up, either! Break free! As Dr. Phil would say, "You can't change what you don't acknowledge."


I'll post some pictures of this album on an upcoming blog entry. For now, I'll rewind a couple months to catch you up on my Biltmore album.


[Wednesday, July 16, 2008]

We've been enjoying a nice respite from work this week, and despite staycating, I've finally had a chance to work on my scrapbook. The week of staycating (i.e., using time off work to stay at home) has been fun. We went to St. Michaels and, while there, visited the graves of my great-great grandparents. We saw Body Worlds, ate crabs and took Summer to the playground. In short, we stole some time from the world. Unfortunately for Adam, the week wasn't all pleasantries. Early on, he jammed his middle toe against one of Summer's toys, which, at the very least, broke a large blood vessel and, at the very most, sprained it. We've both had our bouts with toe torture over the last year. Read about mine in a previous post.


For this page in the Biltmore album, I know I want to mimic the diamond pattern from the previous page. While I'm considering my options, Kathy wants some professionally cut letters in gold for her Shamrock Fest two-page spread. After I cut the letters, Kathy isn't sure if the letters should be split by word or split evenly. We concur - evenly. We chit-chat about Facebook, the new 90210 series and her going back to school.


I take a short break to read a few books with Summer and help Adam get her ready for bed. I am so delighted about her interest in books. She has the most amazing memory. After reading a book once or twice and pointing out various things, we often ask her questions about the pictures, and she remembers! We have books on each level of the house just for her: a dresser drawer full in our bedroom, a basket full in the living room, and a shelf full in the basement. (Since we've been potty training, we also have a few strategically left in the bathrooms.) She loves to pick them out and has recently started requesting them by title. Among her favorite books: The Belly Button Book by Sandra Boynton, Babybug (which she affectionately calls "Kim and Carrots"), Clarabella's Teeth by An Vrombaut, The Tiny Star by Arthur Ginolfi, and, of course, Mommy's scrapbooks!


Once Summer is down for the night, I return downstairs. Kathy has another question about her spread: would the letters look better vertically or horizontally? Definitely horizontally; they don't fit as well vertically. Then, I suggest she use the two leftover pieces of gold as photo mats, one on each page to tie the punchy color together. Her next mission: labels for pix of bands. Star maker? Galaxy micro maker? I find a stencil with a star, so she uses that with the gold remnants to caption her pictures.

Returning to my page, I'll have room for a title on this page, but I'm not sure what it will be yet. One of the only pages of the tour inside Biltmore House contains pictures. Both of these pix have plants in them so I'd like to try to mimic that somehow using various shades of green cardstock.


Kathy packs up her stash and I walk her to the door. She has a long 3-minute ride home!


When I return to scrapbook, the mood and motivation have evaporated, so I decide to pick it up again tomorrow.


[Thursday, July 17, 2008]


I make two palm-like branches out of evergreen and honeydew cardstock. With a pencil, I lightly draw a stem in the direction the palm will grow. Then, using the multi purpose scissors, I snip the paper into leaves. (image 1)


image 1

The light green one seems too light, so using the green round-tip pen, I color in some of the leaves. (image 2)

image 2

I'm not too thrilled with the result, so I cut another palm in a more traditional green cardstock. In order to make the leaves seem more natural, I snip some in half and at mid-length. I also randomly cut the ends of some leaves so they don't appear as fabricated. With the multi-purpose scissors, I also cut a shape of a stone pot out of the remnant of clay cardstock. (image 3)


image 3
Satisfied with the embellishment, I happily move on to rest of the page.


I consider cropping the pic of Jennifer & Leslie on the balcony but opt against it because I reason that I shot the picture intentionally to illustrate the length of the balcony. I decide to journal on the paper next to the palms and, using the titletopia, adhere ABC/123 stickers around the diamond shape, which I cut out using the diamond shape from the gemstone patterns and the green and blue blades from the custom cutting system.


I'll still need to fill in the top right space with an embellishment of some kind, as well as the center of the diamond shape. For now, I adhere everything else and take a break to eat more crabs. (image 4)


image 4

[Friday, July 18, 2008]

Okay, so it was a long break, and no I wasn't eating crabs the whole time! That's the beauty of staycation - nothing to do and all day to do it! Although, we are leaving for the beach in an hour, so I'm trying to finish up this page.

First thing I want to do is the title. I don't have any ABC/123 stickers downstairs, so I go upstairs into the office and search through my stash. I pull everything out that's green. I have 5/8" Sassy in clover, 5/8" Classy in pistachio, and 3/8" Classy in ivy. I lay all of these on top of my page. Right away, I see the pistachio will be too light. Because my title "Taking a Break" will need to fit around the diamond, I opt for the 3/8" size in ivy. Because the diamond will act as my "aligner" I don't need to use titletopia but I will need the multi-purpose tool. (image 5)

image 5


To ensure the letters are spaced evenly, I count letters and start with the ones in the center of each line. When counting, I'm careful to include spaces. (image 6)


image 6


Next, I focus on journaling. Picking the right ink color is often challenging. In part, it's from having so many fine-tip pens! I test the five candidates on a scrap piece of the clay cardstock I'll be using. Green is out (too bright). Purple, plum and cocoa blend in too much, so olive wins! Plus it coordinates with the ivy ABC/123 stickers I used in the title. (image 7)


image 7

To finish off the page, I free draw the design from the balcony wall in my picture onto a scrap of clay cardstock, cut it with the multi-purpose scissors and adhere with tape runner. To fill the space in between the title, I professionally cut a clock in honeydew cardstock and adhere with tape runner. I wipe the pictures with my photo polishing cloth, then slide on a page protector. (image 8)


image 8


Sunday, July 27, 2008

Painting with paper (and Bob Ross)

[Monday, June 23, 2008]


I need to lose myself in something today, forget about the rest of the world. Anything crafty usually does the trick. I just happen to be in the process of completing my scrapbook chronicling my trip to Biltmore Estate in Asheville, NC. Go fig. I decide to continue.


My next set of pictures/postcards requires a two-page spread. After viewing the Salon, we were able to take a break from the tour and enjoy the spectacular view of the Blue Ridge Mountains from the balcony (accessible from the Music Room), much like the guests of Biltmore House did in Vanderbilt's day. This was the first chance we had to resume picture-snapping as well.


When creating a two-page spread, it's ideal to decorate the pages using a cohesive color-scheme or coordinating embellishments. Doing so indicates to the reader that the pages should be viewed as one.


My first thought last night when I was silently mulling, plotting, scheming my approach to these pages was that I'd incorporate a sheet of background paper that features French script and a side profile of a femmebot, the perfect correlation to some of the artifacts in the Salon which belonged to Napoleon Bonaparte. It would also echo the primary use for the room, which was an after-dinner entertainment area for female guests of Biltmore. (image 1)


Ultimately, I decide the paper is too busy and its image would be obscured by the other elements on the page. I do have a smaller cardstock version of the femme profile, so I decide to use it on the page. I find another piece of decorative paper from the same pack in an argyle pattern featuring shades of the colors in the postcard. I use this and one of my own pictures on this page. (image 2)


I make a mental note to find or create an embellishment that illustrates early 20th c. gaming. For now, I explore the possibilities for background paper for the as-built and a journaling box. It doesn't take me long. I find an eggplant remnant from the now-retired Colonial paper pack. I also decide to use the leftover portion of the parchment from the fork/knife die-cut on the previous page for the journaling box.


I mark (with a pencil, of course) and cut the eggplant background paper with the personal trimmer and adhere it to the gold dust refill page with tape runner. I play with the position for the journaling box (letter or landscape?). I also comtemplate adding a short title here (Tour Break), but decide instead to use that on the following all-picture page. That decision makes the position of the journaling box easier. (image 3)


I take a short break and have lunch with Adam. Shortly, thereafter, he leaves for work, and I return to the scrapbook table.


For the journaling, I select the basic black fine-tip pen. With that complete, I turn my attention to the gaming embellishment. I know this will take much inventiveness, so I go upstairs in search of a hair clip to sweep my hair up. Much like Violet from Lemony Snicket's A Series of Unfortunate Events, I think best when my hair isn't a nuisance. Over the last few graphs, I've been stewing over what to create here, and I finally decided to create a roulette wheel.


Using several shades of single-color paper and the custom cutting system with circle patterns and both the regular and mini-circle punches, I think I can pull this off.


I place the patterns over the area where the wheel will live (yes, what of it, I used to watch Bob Ross, and I, along with Kathy H., even took a painting class featuring his artwork - RIP, Bob Ross, RIP) to determine the max size for the outermost circle. Since I have three blades (red, blue, green), I can cut three sizes with each pattern (for a total of nine sizes). I start by cutting the outermost circle in dark brown with the largest circle pattern and the green (medium) blade. (image 4)


Using the same circle pattern, I cut a light brown circle with the blue (small) blade. Now, I have two concentric circles in different shades of brown.


To get the center part of the wheel, I select the smallest circle pattern and using the red (largest) blade, I cut a black circle. To achieve the red slots on the wheel, I'll first need to punch a 1 1/4 inch circle (slightly larger than the black) into the red paper with the regular circle punch. This will make getting the outline of a red circle easier. I place the small circle pattern over the hole of the circle I just punched (image 5)


Now, I know what you might be thinking. Is she going to cut that little red circle into tiny pieces to mimic the red/black alternating pattern? The answer is .... NOOO! I'm not that patient nor that talented. Instead, I'll use a black fine-tip pen and color in alternating black blocks on the red circle outline. I place a scrap piece of paper behind the red circle outline, and, applying my renown principle of halving, I place two marks on the top and bottom followed by two on each side. Then, I place one mark in the center of each of the previous lines. This ensures each section will be exactly the same size. (Mr. Bandy, I renige my foolish adolescent assertion that I'd never use math for anything in life.)


Now that my marks are complete, I can fill in every other one with the black fine-tip pen. (image 6)


For the center to be just right, I punch a 3/4 inch gray circle with the mini-circle punch, then directly over that punch a 1-inch circle. To achieve a shimmer effect, I will do the same thing on a scrap piece of vellum. In order to avoid the painstaking task of applying adhesive to the vellum, I put photo splits on the gray paper prior to punching. (image 7)


I use the gray circle I punched out for the centermost area. I place equilateral markes on the vellum ring with my pencil to mimick the dimension on the section just inside the numerical ring. The turning mechanism in the very center will be illustrated using a silver eyelet set with my silent setter and an upside down brad. I adhere all the mini circles with the precision point adhesive (glue pen) and the big circles with tape runner. It's nearly done.

The final touch are some silver accents around the center part of the wheel using the silver precious elements pen. I affix a few 3-D dots, and after that creation, I'm confident my powers are fully restored. (image 8)


For those who might be wondering, below is a picture of the painting I did from the Bob Ross class. Quite interesting how each person's interpretation of the instructions differed. Charlie had a paw in it also.


Sunday, June 29, 2008

Return to the ruddy scrapbook

[Sunday, June 22, 2008]

The busy spring season has finally come to a close, and once again, I let my stash slowly emerge from its hibernation. Fortunately, yesterday, while the girls worked on their projects during Crop Till Ya Drop, I was able to set up my work space so that I might continue with the Biltmore scrapbook.

There are times when after long, long breaks from working on my scrapbook, I feel that my knowledge, creativity, and craftiness (collectively, my power) have evaporated. It's only after I re-acquaint myself with my stash, previously scrapped pages, and my pictures, that I start to feel the buzz again. If Tim Russert's heaven is a daily edition of Meet the Press, then mine is a neverending loop of scrapbooking (and reading, of course).

After sorting through and fondling each scrap, piece of paper, sticker pack and memorabilia from my trip plus reviewing the pages I've completed thus far, I feel sufficiently immersed, though my hands unsteady. Turns out I'd made more progress on the next page than I thought. (image 1)

Image 1

At this point, I stand up to reach for the camera, which sits on the buffet, so I can document my progress in pictures. Charlie always sleeps curled up to my right when I'm working. Whenever I stand up or even move slightly, he jumps up out of his sleep, afraid I'm going to either go somewhere or leave him behind. He's such a rattled, skittish dog. If I need a special tool or embellishment that requires me to get up or move, I sometimes find myself seeking alternative solutions that will not disturb his slumber. When Summer is awake, he rarely gets any decent shut-eye. (image 2)


Image 2

I'm continuing the tour through Biltmore House, and I had already cut the as-built for the page and the postcards. I also printed the descriptions of each of the rooms for this and the next two pages on vellum, so all that's left is selecting background paper for the vellum. I'm looking for something both decorative and warm, a printed or patterned sheet that ties the colors together or makes the postcard images pop off the page. It won't matter how busy the print because the vellum will soften it. I happen upon three possibilities (image 3).


Image 3
All three will work well, but the middle one mimicks the grandeur of the Banquet Hall (the largest and most stately room in Biltmore House), with its chunky, sweeping paisleys. I push the others to the side and set to work on the vellum accents. I trim the areas of the vellum I need with the straight trimmer, then mark on the background paper where I need to cut with the personal trimmer. Then I adhere the vellum with the frosted photo splits, which virtually disappear behind the vellum.

Then I adhere everything to the gold dust page with tape runner plus 3-D dots for the smallest postcard in the middle. One personal note: On your layouts, don't be afraid to let items overlap one another or to repeat images. This creates dimension and visual interest. It also keeps the reader's eye flowing over the page. (image 4)


Image 4

I decide to add one more item to the page because the white space appears more like a gaping hole to me than a design choice. I professionally cut a fork and knife to go along with the theme in coordinating colors. I use precision point adhesive to attach the images to each other and to the page. (image 5)


Image 5

This layout was the perfect way for me to warm up my rusty, ruddy bailiwick.


Sunday, June 8, 2008

These Walls are talkin'

[Sunday, June 8, 2008]

For those who may be wondering, I have not abandoned my blog. I've just been having an unusually busy spring. So busy, in fact, I've barely had a chance to enjoy the fact that we've actually had a spring in terms of weather. Yesterday was our first day of 90+ degree weather (with heat index over 100) in the Baltimore area. Of course, the balmy air couldn't hold out for just one more day, so the guests of the bridal shower I hosted could enjoy the serene quasi-garden Adam and I have been cultivating on the deck for the last few months.


Weather rarely cooperates.


Despite that, the celebration went swimmingly. Even our visitors went swimming to get here (through the soupy air). My white chocolate-dipped strawberries and spinach balls were a hit as were my wall decorations (see below). Even the three gracefully suspended clusters of balloons left no trace of their prior entanglement. We closed the front door for the last time and put our house back together. Adam and I were all set to wind down the evening by playing zoo animals with Summer in the basement, sipping a couple of drinks, and catching a few minutes here and there of Million Dollar Baby. Summarily, thunder cracked with a frequency that indicated rain would soon commence. I thought, good, I don't have to water the plants now. ZAP! Everything went black. We were stuck in the basement in the thick darkness - our turn to swim.

In four years, this is honest-to-God the first time we ever lost power at this house for an extended period of time. Most of the reason is because our power lines are underground. But, living down the street from Constellation Energy also has its benefits.

Our basement is L-shaped. Summer was at the base of the L - where most of her toys migrated from upstairs for the party -- and subsequently began to cry. Everywhere she stepped, she stumbled. Adam tried to reach for her, but his beer tipped over and spilled all over something we couldn't see. "I've got her," Adam said, and navigated his way over to the stairs. Charlie had been underfoot since the thunder began. Coupled with that and the balloons all over the house, it had not been his best day. He was standing so close to me, I thought his fur would start growing into my legs. I tripped over him trying to get to Adam and Summer. "I can't see where you are," I said, "When you get up the stairs, let me know." That's when Adam remembered the flashlight he had stored just inside the laundry room. When he turned it on, our collective relief was audible. It was then we noticed that most of the spilled beer had landed on Charlie.


We made it upstairs and lit some candles in the living room. Then we sat and waited and waited and waited. Adam meandered into the kitchen without a flashlight or candle. CRASH! Glass shattered all over the floor. "Oooh, what was that?" I asked accusingly. "One of your many wine glasses," came his irritated response. "It just went all over me." I ran to grab Summer, so she wouldn't walk into the kitchen. Adam came out and proceeded to check his appendages for shards of glass, then he returned to the kitchen (with shoes) to clean it up. "What were you trying to get?" I asked. Reluctant to tell the truth, Adam quickly made up, "I was getting you a drink." Knowing that was a fib, I responded, "Why would you do that when you know you'd have to open the fridge?" Adam said, "Ok, I was trying to get a coozie for what's left of my beer." A very common thing people try to do in pitch darkness.


It was apparent the power wasn't coming back on anytime soon, and, since it was well after Summer's bedtime, we decided to go upstairs. We knew Summer wasn't likely to sleep in her own room without the nightlight, so we put her in our bed. Unfortunately, she just viewed this a VERY long story time, and hopped around on the bed like a monkey. Since we had a flashlight on, she thought her shadow on the wall was a friend who had come to visit her. "What's that?" she said, pointing to her shape. She repeated our one-word answer as "sadow." When we moved the flashlight, she said, "Where sadow go?" Being the clever parents we are, we exchanged a strategic glance and said in unison, "Shadow went night-night." She didn't buy it. Now, most days we are proud of our daughter's perceptive mind, but there are occasions when we wish gullibility would assume the space.
It was clear Summer wasn't ready for a big girl bed much less sleeping with Mommy and Daddy (I know, some of you out there are thinking, we should be so lucky). Instead, we jerry-rigged a nightlight outside of her bedroom door with a flashlight. The ordinarily cursed upon battery-powered toys became a blessing, as her twilight turtle glowed and music box sang oblivious to the breakdown.

Summer finally settled down to sleep, and we snoozed briefly when about 2:30 am, the power came back on. I woke immediately and said to Adam, "The power's back on." Then rolled back to sleep. The next morning, Adam said, "I don't know how you knew the power was back on. But when you said that, I looked out the window and saw all the neighbor's lights were on." Now, here's a thing I think some men will never get. How do women - especially mothers -know everything in their sleep? Because the truth of the matter is, we are never really completely asleep. There's a part of our minds, reserved for our little ones, that must always keep vigil. I'm convinced part of the child stays with the mother or part of the mother goes with the child post-birth.


What does all this have to do with scrapbooking? Well, nothing. I just thought I'd share a little anecdote as well as the wall decorations I made for the shower to break from traditional scrapbooking.


Using my Everyday Display, I created a little vignette with a message for the bride-to-be on her special day in the colors of the wedding. The background is a sheet of crimson paper. The flowers and vase and all the letters, I professionally cut in black and white paper. I started to put the word "Celebrate" on vellum on the black strip of paper suspended by the mini clothes pins that came with the display, but I didn't like it, so instead I professionally cut the word "Celebrate" and, with tape runner, adhered it on an outline of the same in crimson paper. The letters J-E-N-N are raised with 3-D dots and the magnets that came with the display hold the "It's Your Day" phrase. The result is a cute decoration that can be re-used in a scrapbook or for another occasion. (image 1)


Image 1
The second decoration involved making a wall poster on the CM Photo Center. Using the pictures the bride-to-be sent me of the day they got engaged, I selected the wedding/love template, uploaded the pictures and dropped them into place. Unfortunately, the photos were a low resolution (640 x 480), so I called on my cousin, who is adept at photograph manipulation, and asked her advice. I knew I could enlarge them, but I wasn't sure how much, and I didn't want them to be grainy or pixelated. She suggested I adjust the dpi (dots per inch) to 300, and increase the size to 5 inches wide. This did just the trick. I played with changing the pictures to both gray and sepia before ultimately flipping them back to full color. I edited the text area to "Congratulations, Mike & Jenn" followed by the date of their engagement. The poster turned out great, and it was a nice keepsake for the bride-to-be to take home. (image 2)


Image 2

Create your own posters at the CM Photo Center in the following themes:
  • 6 Disney options (Disney, Cars, Mickey Mouse, Pooh, Princesses, and Hannah Montana)
  • 2 Graduation/Achievement options
  • 2 celebration/birthday options
  • 4 versatile multi-use options (2 using Primary Power Palette artwork, 1 using Earthy Power Palette artwork, 1 using For Her artwork)
  • 1 wedding/love option

Be sure to enter my consultant ID when you register/login to CM Photo Center: 94484775


Thursday, March 13, 2008

Earth, Wine and Tier

[Saturday evening, February 23, 2008]

It's another get-my-stash-out-of-hiding session. It'll be a few weeks before my next self-hosted event (Mar 22 - Crop Till Ya Drop - be there or be square), so I have time to comfortably spread out and get some more cropping done.

Mom is here. She just finished going through the new Creative Memories spring/summer catalog, marveling at everything that is changing. For those who don't know, CM now boasts true 12 x 12 pages, albums, and power palettes, so everything is interchangeable with other scrapbook suppliers.

Before I begin working on my next page layout, I contemplate what to do with the keepsake photo of Jennifer, Leslie, Shannon and I inside Biltmore House in front of the Winter Garden. My goal is to incorporate it into the album seamlessly so no one perusing it has to fumble with pulling it out of a sleeve yet can still view it in its original form.

Kathy H. recently suggested that using ribbon I could somehow bind it to the ruby album. I run upstairs and rummage around in my wrappings "organizer". I quickly locate some gold and burgundy ribbon. Back downstairs I secure the gold ribbon around the picture (burgundy was too short), tie a knot and slide the picture + ribbon over the album binding. I open/close the picture-folder a few times, then slide another original 12 x 12 page over it. Everything fits beautifully and the pic-folder opens with such ease! Kathy, GINORMOUS props to you for this fabulously creative idea! (images 1, 2, 3)

Image 1

Image 2


Image 3
Since the next part of the album is the tour of Biltmore, some of it will be illustrated with postcards, some with photos (because we weren't able to take photos inside). The first page is the main entry. I previously copied the as-builts from the tour program, so I start by cutting the as-built of the main floor and add that to my layout. (image 4)


Image 4
Since I'm using an original white 12 x 12 page, I'd like to create a background or mat for it. I consider using a double mat with two sheets from the Cottage Storybox. I also consider a single mat for the as-built and postcards with a sheet of background paper. Because the postcard images are quasi-busy, I have to be careful the print on the background paper doesn't trump the postcards.

While the various papers jockey for position on my page, I inadvertently knock my glass of wine over and it splatters up the wall and into Charlie's dishes below. Reacting quickly, mom grabs some paper towels, and I wipe up what I can. I rinse and wipe out Charlie's bowls lest he get a little drink in him and start howling at the moon. (Now, that I think about it, maybe it would actually silent his incessant barking.)

When I return to my page, I'm not closer to selecting paper for my page but the aroma from the spill is wafting around the room and into my nasal passages, sending me into reverie about our aventura de vino, an a propos inspiration for my work.

The palette will most certainly be earthy. (Too bad I don't have the new Earthy Power Palette yet!) I find a sage-checked paper that will help bring out the green felt on the pool and carom tables. I also decide on a woodsy brown to backdrop the winter garden. I may use the same woodsy brown to deliver the title "Main Floor." (image 5)


Image 5
Unfortunately, the lingering aroma of the Woodbridge White Zinfandel isn't enough to keep me awake, so I bid Mom adieu and head to bed.


[Sunday morning and afternoon, February 24]

I've been randomly visiting my scrapbook area this morning hunting for various paper and other papyrus embellishments. (It's akin to grazing and meandering about a party buffet.) I ultimately decide to use vellum to print out some of my journaling, which primarily comprises the descriptions on the reverse side of the postcards.

After Adam leaves for work, and I put Summer down for a nap, I set to work. Because I want to conserve the vellum (printing only once), I carefully space out each passage, so I can fit several onto one sheet of vellum. For the first two, I measure the areas where I'll adhere the vellum, then in MS Word, I create text boxes to fit those specs. Then, I play with fonts and font size, finally choosing Book Antiqua. (image 6)

Image 6
I decide to add numbers in the journaling boxes corresponding to the numbers on the as-built. I save the file and return to the page layout. I adhere everything else with tape runner. I happened upon a specialty paper in my stash with orange hues and one with brown hues, both flower-shaped. I decide to attach them together with an eyelet. The eyelet will make the entire floral embellishment appear that it is secured to the page with the eyelet itself. I have a silent setter (convenient when Summer is napping - otherwise it would sound like Handy Manny's tools inhaled a little too much sawdust). I adhere both "flowers" together with tape runner. Then, I make the hole using one of the cutting attachments on the setter. (image 7)


Image 7
I place a brown eyelet in the hole, turn the entire embellishment over and using the setting attachment that corresponds to the hole, force the eyelet backing into "wings." (image 8)

Image 8
Before I adhere this to my page, I turn my attention to the title. The position of that will affect where I place the floral embellishment. I don't have any clover, pistachio or mandarin ABC/123 stickers open, so I go upstairs to retrieve a set of each. Ivy would probably be best but I don't have any on-hand (mental note to order some). Pistachio proves too soft. Clover doesn't coordinate either. So, the verdict is mandarin.

To place the letters evenly, I use the Titletopia Circles & Banners aligner along with the multi-purpose tool and clips (see Favorite Page and Favorite Tool for how-to recap). With the letters/title adhered, I place the floral embellishment. The final element will be journaling, which I may do later or after my next layout. Haven't decided. (image 9)

Image 9
Mom arrived some time ago and is trying to determine what color letters to use on a bright blue background paper. She is working on a two-page spread. The other page with pink on pink-checked paper. Her choices are royal blue, bubblegum or black. None of those seem to work, so I suggest yellow, which she has, but she asks to see what else I have. I show her an array, and she selects blueberry as well as a few others.

My next page is simple. I adhere a sheet of background paper and using one of the large memorabilia pockets, I display the tour program guide. Both the small and large memorabilia pockets afford the inclusion of memorabilia that we don't want to permanently adhere but still wish to incorporate into our albums. The title for this page will be "Take the tour with us," and I'll be using ABC/123 stickers in wine. (image 10)


Image 10

I stop here for now. Summer will be waking soon, and I need to start dinner.

Once Summer has had her bath and is in bed for the night, I print the vellum with journaling descriptions and finish the first page I started. I cut the first vellum box to fit a green-checked tag I had previously reserved for this page. I adhere it with frosted photo splits so the adhesive "disappears." I use the silent setter cutter attachment to "punch" a small hole where its outline is on the tag. Then, adhering 3-D dots, I affix it to the page. (image 11)

Image 11

I cut the next piece of vellum to fit the space just above the billiards postcard. Same as the previous piece, I adhere it with frosted photo splits. I wanted to handwrite the unborrowed journaling for the page, so using the leftover strip I cut from the green photo mat, I scribe re: this part of the tour. I choose the copper metallic fine-tip pen b/c it ties the color scheme together. I adhere the strip to the page with tape runner and slide the page protector on. (image 12)


Image 12


Sunday, February 17, 2008

The P-R-O-O-F is in the pictures

[Saturday, January 26, 2008, cont.]

My next layout should be fairly simple. I have two photos plus one postcard. The arrangement will fit into a neat square including journaling. I crop the pic of the Oscar Mayer weiner mobile (no, we didn't sing the jingle) to fit, then choose two background papers to coordinate with the page. (image 1)


image 1

Next, I trim a small box of maize single-color paper for journaling. I choose the black fine-tip pen (because there's a hint of black in the pix), then adhere the box with tape runner above the postcard. I also write a small caption under the pic of the Oscar Mayer weiner mobile.

I stop here for now and will resume tomorrow.

[Sunday, January 27, 2008]

I know I want to add a title in the top left area positioning the letters vertically, but I'm still thinking of the perfect word. I take most of the day to surmount this obstacle. I go about chores, flip through scrapbooking magazines, play with Summer, type in various words on merriam webster online, and search my stash, just waiting for my eureka moment. I consider a range of things from "kings" to "greetings" to "smile", but none of them truly capture the essence of the photos. I finally admit I have scrapper's block. Just as I'm about to settle for one of my beggared ideas, I ask myself: why do we take pictures of ourselves flanked alongside renown monuments, edifices, and other landmarks? Then, while on the phone no less, it hit me. We do it for proof. We want proof that we stood in that spot or saw that specific thing in a place where people go to see and to be seen. A place created, to a large extent, for photo opportunities. At the end of the day, all we really want is bragging rights or a chance to randomly say I was there whenever the topic arises.

I had already selected the letters I wanted to use from my stash, so I just spell out the word P-R-O-O-F, inked the edges with a black fine-tip pen, and gave them a salmon-colored backdrop. To complete the thought and help draw the eye across the page, I add another salmon-colored box on the bottom right corner, filling it with "I was here" in my own scrawl. Sometimes it pays to take time and ponder options. I wipe the photos with my polishing cloth and slide on a page protector, thankful for my resolve and satisfied that I have successfully completed two more pages, even if it did take two days. (image 2)


image 2

An inkling about inking

There are myriad techniques for inking the edges of photos, paper, letters, etc. in a scrapbook. The most common is with ink pads and sponges. However, in my opinion, that is a recipe for disaster. I try to keep ink pads as far away from my scrapbooks and paper supply as I can. A short cut to inking paper is to use a fine-tip pen and place the paper you want to ink onto another piece of scratch paper. Using the fine-tip pen, trace around the edges of the paper so that part of the ink makes it on the paper for your scrapbook and part of the ink makes it on the scratch paper. To me, this is a less messy way of inking.


Monday, January 28, 2008

Charged with scraplifting in the first degree

[January 21, 2008]

I've finally managed to eek out a few hours since the holidays to continue work on my Biltmore scrapbook. As with previous moratoriums, I must spend a few minutes re-acclimating myself to my stash and photos and wiping the cobwebs off my tools. It is akin to piddling.

Adam, my faithful companion, is providing me with good company. He's online and just discovered a military patch that has eluded him for years. He's also watching Gunsmoke - one of his favorite TV shows of all time. We're both enjoying some time off work today. We sent Summer to the babysitter to play with her little friends this afternoon. I wish we could have about a month of days like this.

While piddling, I remember that I left off at the Winery tour/tasting, which means I can now move onto the tour of the Biltmore House. I begin by sifting through my pictures, which are quite a few. I might need to edit them lest I have 6 - 7 pages of just the tour. A quick count reveals 24 pictures. I review my stash for mementos and any embellishments. I already know I have the pic of the four of us in the Winter Garden inside the house and the program guide to include. These items may go in a clear portrait sleeve or memorabilia pocket. Because we couldn't take pictures inside the house, I know I'll have a few postcards to illustrate our journey within the house. I've organized the postcards in the order that follows the tour of Biltmore House. I contemplate copying the as-builts to go along with each page. Before I begin journaling this section, I decide to re-read the guide book to Biltmore, to recall the facts, stats and trivia of the house.

The first page will need to contain a title which I haven't decided on. I also want to include one of the smaller postcards of the facade. Because my camera doesn't have a panoramic option or a wide-angle lens, I often try to snap long scapes with multiple exposures. It doesn't always work, but, this time, it worked out pretty well. I use two of the pictures along the bottom of the page. (image 1)


image 1
Aunt Judy just returned my call to say that Bob is home now. Uncle Bob had a heart attack over the weekend and was in the hospital. "It's like nothing happened," she said. "He never wasn't himself." Adam and I are both glad Bob is recovering and that the blockage didn't require him to have surgery.

For the title, I consider "Biltmore House" and, using Titletopia, wrap the letters around the small postcard. I would then have room under it to transfer the text from the reverse of the postcard. That would leave the top right of the page for journaling. With my plan in place, I focus first on cropping and arranging my jerry-rigged panorama. I decide to cut around the house, leaving only the edifice itself, reasoning, as usual, that if I don't like it, I always have the other two copies of the pictures. After I cut out the sky using the multi-purpose scissors, I line up the two images and join them at the point of intersection with tape runner. I use a leftover strip of olive single color paper to anchor the image visually. (image 2)


image 2

I change my mind re: the large space for journaling. I decide instead to use the brochure on this page with a memorabilia pocket. Scrapbooker's block creeps upon me, and I get stuck rearranging the items, so I take a break to pick up Summer.

[January 26, 2008]

At times, it is easier (for me) to play with a layout mentally, mull it over, while occupying myself with other tasks away from the page itself. After some inspirational reading, I decide the layout is lacking something, a controlled image, perhaps. Now, ordinarily, a background paper with an image would suffice, but, after leafing through the Guide to Biltmore, I decide to create a backdrop which will mimick the sloping spires on Biltmore House. I'll achieve this with varying colors of single-color paper.

This new idea means that both the postcard and brochure are out. Since this is an intro page for the series of House tour pictures, one image, a title and a large journaling box should complete the layout. I set to work on the backdrop, trimming one sheet each of smoke, fog and key lime single-color paper. I cut triangular shapes from smoke and fog, where I've drawn faint pencil lines.

In order to adhere the backdrop, I first need to scraplift the panorama at the bottom of the page. Scraplifting is very simple, especially if you've used tape runner. Slip the multi-purpose tool (or your fingers) under the adhered element and slowly pluck it from the page. If any adhesive is left on the page and you don't want it there, remove it with the pick-up square (or scrape it with any fingernails you might have). Since I need the adhesive, I leave it. I connect the three sections of roof with photo splits. (image 3)

image 3

With a pencil (my indispensible tool), I lightly draw in the edges of the shingles. I'm fortunate to have been blessed with some writing ability because if I had to make a living drawing, we'd surely be destitute. As I clumsily make the rhythmic lines, I consider employing a straight edge to help me, but after a couple of the too-perfect lines, I concede they will look too contrived. While I fill in the remaining lines, Summer toddles over and sees me "drawing." She walks over to where her AquaDoodle hangs on the wall and lifts up her arm, indicating she wants the water pen so she can draw, too.

When I'm finished, I go over the roof lightly with my eraser to diminish its definition. After all, the naked eye rarely captures each precisiver line of a rooftop. Satisfied with my above-par work, I'm ready to add the trim. (image 4)


image 4

I cut two 1/4-inch strips of key lime paper, line them up, marking where they meet at the top with my pencil. I trim off a little corner of one with the multi-purpose scissors so they easily fit together. Using the mini tape runner, I adhere both strips to the roof. (image 5).

image 5

Kathy has come to visit and scrap with me. We chat about having too much stash to sort through when we are working as well as the deplorable state of network TV, including the uncanny longevity of ER and the desperation of shows like The Moment of Truth. Could anyone really be stupid enough to throw his entire life away for a little cash? It violates man's last right to privacy.

To give my page relief, I affix dimensional adhesive to the backside of the previously constructed panorama.

For the journaling, I can't decide which color paper to use: lavender or eggplant. I try eggplant first with the copper metallic fine-tip pen, but the ink doesn't show very well. I write over it with the silver metallic fine-tip pen, and it looks better, but I still don't like it. I start over with the lavender paper and the purple fine-tip pen. I write the passage using journaltopia, so the lines are straight. Then, I add some dimensional adhesive so it is the same relief as the panorama. (image 6)

image 6
Kathy solicits my advice on her current page, which is a concert. She has cropped her pictures down, so she is able to fit 12 - 15 on the two-page spread. She has a knack for this kind of stuffing, because her pictures never over- or underwhelm her page. "Should I put the pix of people on one side and the bands on the other or mix them together?" I reply, "I vote for mixing them together because it would be more visually interesting. Specifically, I think a grouping of the five band pictures that are the same size would look great in a horizontal row across the page."

To complete my page, I professionally cut letters for the title "Biltmore House." To make them pop, I ink the edges with the purple round-tip pen, then affix dimensional adhesive to each letter to achieve the same relief. (image 7). I slide a page protector on, thankful to be acquitted.

image 7
Related Posts with Thumbnails