Sunday, December 30, 2007

Dredging dry wall, oysters and scrapbooks

[Sunday, December 29, 2007]

For us, the manic part of the year is drawing to a close. While I thoroughly enjoy Christmas, I am thankful I won't need to think about its preparations for at least another seven months. I do hope all of you had a restful and memorable holiday. Mine would have been more restful had I not injured my neck earlier in the month, which many of you know about. I've 90% recovered from this, but it was not a peachy time.

I am back to blogging about scrapbooking and other drivel.

I had one last post prepared before the holidays assumed possession of my mind and body, so here it is in its glory.

[Sunday afternoon, October 28, 2007]

Once again, I'm using my Sunday afternoon reprieve from maternal and household duties to chisel away at the Biltmore scrapbook, while trying to ignore the dripping water in the downstairs bathroom. Yes, we are having more plumbing issues. This time the leak isn't over our sofa, but over the shower, so not only are we paying for unused water but also the waste water! After demolishing the dry wall, Adam thinks it's the condensation line to our heating/cooling system, so he calls a local heating/cooling company before heading to work. A more scrutinous look revealed later that it was just the ice maker line to our fridge.

As some of you know, this innocent little leak uncovered a much bigger issue in that we've been running on emergency heat for a very long time. What we though was just BGE greed with state-wide rate hikes was actually us paying for emergency heat! So we ended up getting our entire heating/cooling system replaced for a whopping five grand. Sometimes I think the homeless people I pass every day going to work might be more shrewd than I think.

I've taken quite a long hiatus from the Biltmore scrapbook. Other projects and events have taken precedence. I set a goal of completing this project by year-end, but sometimes no matter how hard I try, no matter how many minutes of the days I'm able to steal, it does take me longer. Life intervenes. The rub there is, if life did not intervene, there would be no memories to preserve. Long live life.

The next page I am doing is just a montage of the bottles of wine I purchased and the instructional placemat, which I was looking for in Scavenger Hunt. I did end up finding the placemat. It was in the basement tucked under the wine rack in that little space between where the stemware hang and the serving area. I happened to see it poking out of there one morning when I was putting in a Boz DVD for Summer.

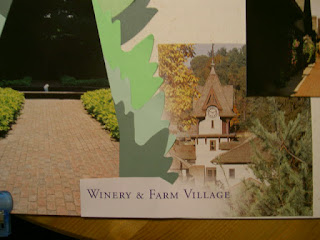
For this page, I think I'm going to try out a layout idea I read about in a magazine. This will involve making some precise measurements and cuts, but I think it's worth a try. First, I'll need some printed background paper, so I search my stash. None of the remaining paper I earmarked for this project will work. The print has to be a backdrop only, so I want it to be busy but with no overt images. I look in one of my paper files. Nothing there. Then, I remember the paper I used for mom's birthday invitations. The sheets are 6 x 6, so I'll have to piece them together and trim a portion off each one. I select one of the designs and lay them out. (image 1)


Image 1

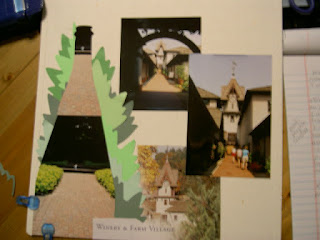
I trim the inside part of the squares, then adhere them with tape runner. I fish out a scrap of salmon paper from my scrap bags and adhere that horizontally across the center to hide the seams of the background paper. I'll tackle the vertical seam later. Next, I choose my foreground paper: light pink. I want this paper to sit one inch inside the background paper so I measure, mark and cut with the 12-inch straight trimmer. The paper should be 9.5" x 9.5". To mark the center on each side, I make a slight indentation with my fingernail. Then, I adhere it with tape runner. (image 2)

Image 2


To trim the photos so that they all nest together on the pink background paper, I must cut each of them to the same size. That involves halving the 9.5 length (4.25) to get the length the photos need to be. Each photo is 5.25" long, so I have to cut off 1/2 an inch from each end. Each pic is 4" wide. Dividing 9.5 by 3 means each pic needs to be approximately 3 and 1/6 inches wide, give or take. (Did I mention I hate math?) I can honestly say this is the first time I've used a calculator for scrapbooking! I trim the photos using the personal trimmer.

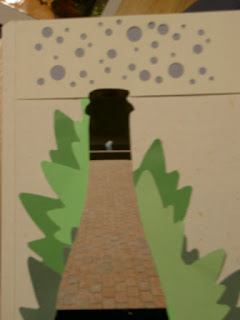
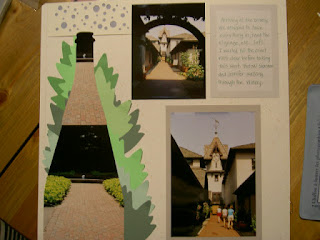
Before adhering the pictures, I add a strip of brown ribbon to cover the vertical seam using mini tape runner. (Working on this page is seriously making me want to cork open a bottle.) I adhere the three pics of the as yet unopened bottles with tape runner. Though not perfect, I am pleased with my progress. (images 3 + 4)


Image 3


Image 4


Now I know approximately the size my scanned image needs to be (9.5 x 4.25) - likely a little less to leave some pink border. I don't have time to do that today, so I stop here. Summer's precious babbling calls.

[Saturday, November 3, 2007]

My friend Amy recently asked me if I'd like to help out with a memory-preserving project involving the Skipjack Martha Lewis. I eagerly agreed to lend my meager expertise as well as donate some supplies to the cause, including tape runner, vintage storybox and archival pens. With monetary donations she received, Amy purchased a ginormous 18 x 23 archival scrapbook, which will be ideal for some of the larger newspaper articles.

Yesterday evening, I joined Amy along with a few other ladies affiliated with the Skipjack Martha Lewis. My foggy, aged eyes managed to navigate the clear night to Joppa, Maryland. Upon arriving, we sorted through articles, photos and other memorabilia related to the Skipjack Martha Lewis, one of the last oyster dredging vessels of its kind. While we didn't get to scrapping any of the items, we sifted and sorted through the items we will be including.

At first, we thought we should put everything in the book chronologically, but it quickly became apparent that doing so might make it difficult for visitors on the vessel to peruse the entire book. Instead, we decided to divide the book into sections, each with different appeal.

First, we organized the newspaper articles and memorabilia (e.g., Alan's permit to restore the boat) into the agreed-upon categories: restoration, educational programs, racing/sailing, media/news and miscellany.

We then moved onto photos, some of them taken by Amy herself. We selected the best images to accompany each category. At one point, I thought I found an excellent shot of some kids on the boat listening to a demonstration about oyster dredging. However, one of the children chose that moment to let his finger take up residence in his nose. We had a good laugh about it, but cast the picture back from whence it came.

At times, we got so wrapped up in reading the articles and discussing the subject matter of the photos, it was difficult to focus. Amy's cats Merlin and Katie frequently nudged our minds from their niche by jumping in our laps and making catnip of our piles.

Not knowing much about skipjacks, specifically the Martha Lewis, I learned quite a bit about boat restoration, oyster dredging and a little of what it takes to properly maintain a sailboat. The goal of our project is to put together a book telling the story of the Skipjack Martha Lewis that future passengers and field-trip going kids can read. As we progress on this project, I'll be blogging about it here. Get information about Skipjack Martha Lewis, sailing events, scheduling field trips, racing, etc.

[Back to Biltmore]

I scanned the placemat I was searching for in Scavenger Hunt, but couldn't reduce it to the exact size I wanted, but I think it will still work. The end size is 7 x 5, which leaves more pink on the page than I was anticipating. So, I decide to cut a section of brown paper for the background to fill the space a little more. (The original intent was to let the pink outline the items on the page.) I adhere the brown paper with tape runner followed by the scanned placemat. (image 5)


Image 5


I realize I dont have much to journal about on this page, so I carefully lift up the brown paper and using the bubble maker punch bubbles into it. I am satisfied with the result so I adhere, wipe photos, and slide on the page protector. (image 6)

Image 6
The next group of photos will be touring the Biltmore House, so stay tuned!

Wednesday, November 21, 2007

Holiday Break

Hi, all. I'll be taking a short hiatus from working on my Biltmore album through the holidays. If I have time, I'll make another post between now and the week of Christmas. I hope you all have splendid holidays if I don't see or speak to you between now and then!

If there is anything you need for your scrapbooks, don't hesitate to contact me or visit my website (everything ships directly to you!).

Saturday, October 27, 2007

The Scavenger Hunt

[Wednesday Sept 5 cont.]

The next group of pix is of the wine tasting. I know I have several mementos to include, so I decide to do a two-page spread for these using the same background paper for each. The background paper contains the names of several grapes and regions in gold lettering.

I begin arranging some of the items. (images 1 and 2) One piece of memorabilia I know I don't want to adhere: the wine-sampling menu/card. I want to be able to pull this out later and look at it. To work this into the page, I select an empty CM sticker sleeve that is longer than the card. The sticker sleeve also happens to be longer than the page, so I trim it off a little. This, I'll adhere to the page, but I'll still be able to remove the wine-sampling menu/card. CM sticker sleeves are acid- and lignin- free, so they are 100% photo-safe. You receive one for each set of stickers you order from CM.

image 1

image 2

I'm getting super sleepy, so I decide to stop for the night.


[Wednesday Sept. 12]


When I take a long break from a scrapbooking project, it sometimes takes me a few minutes to get myself oriented and recall where I left off. Summer is asleep for the night, and Mom is here (her standard night to visit).

I do remember thinking that a maize colored journaling box and/or photo mats would be good here, in order to bring out the gold lettering of the background paper. After testing out the maize along with a lighter, airier yellow from Tuscany Storybox, I decide the lighter shade is actually better. (image 3)

image 3

For the first half of the two-page spread, I determine that I won't have enough room for journaling, but the epoxy sticker "A Day of Wine Tasting" will go well on this page. I also decide to use a few stickers of glasses of red and rose wine to surround the picture of our [word for person who serves at wine tastings]. If I do, I'll have to place them carefully so they don't obscure too much of the background paper. I ask mom if she thinks I should put a background behind the epoxy sticker. "No," she says, "I think it blends in well with the paper." Does it stand out enough? I ask. "Yes," she says. "Were you thinking of using yellows behind it?" Yes, I reply. That, and black are really my only two options. I only have one yellow mat left and I don't want to cut it up just for that. I think I'll let it go.

I crop a bit off the pic of our [word for person who serves at wine tastings], so now I have room under it for a caption. This works out well because I want to record the background story of our [word for person who serves at wine tastings].

I ask Mom if she knows what the word is for someone who serves at wine tastings. She doesn't know. I don't need to know right now, I say. I'll just leave it blank for now. Later, I'll see if I can find it online.

Now that I have the plan in place for page one of the spread, I turn my attention to page two. All I really need to finish off this page is a journaling box. One quick rifle through my stash, and I'm greeted once again by the notepad I pilfered from our Inn @ Biltmore room. This will work perfectly as the journaling box. As I'm rifling, I also come across a snippet I cut from the brochure. The image is of a bottle of Biltmore's Chardonnay Sur Lies. I think this will go well on the page near the receipt from my Winery purchase. (image 4)

image 4
Before I begin slicing and pasting, I contemplate what I might journal about on this page: the tasting and visiting the gift shop afterward. This should give me enough space.

Mom is working on a page in her scrapbook of Ethan (her grandson, my nephew). She isn't sure about the layout because there is an item she wants to include on the page that she doesn't have with her, and she doesn't remember if it is horizontal or vertical. She wants the flow of the page to work visually and in the order that the items should be seen/read. We discuss if the typical layout should flow from L to R or T to B. I think it depends on which items you want readers to focus on. The particular item that she is missing is a memento, a supporting element to the scrapbook page, but not a primary element. She has two potential spaces for it (bottom left or top right). I suggest she places it on the bottom left because the reader will tend to go from L to R and, because of that, she will want readers to focus on the picture first before the supporting memento (i.e., the memento is meaningless without seeing the photo first). Mom works that out.

Meanwhile, I remember that I purchased a placemat at the Winery gift shop that provides instruction on how to taste wine. I can't remember where I put it. I think it is either in the basement or in the office upstairs. I pause to hunt for it. I search the entire basement, near the wine rack, behind the bar, on the bookshelves, but it isn't there. I go upstairs and rummage around the office amid the scrapbooking boxes and tchotchkes, files, dust, etc. and can't make it appear. I grab my cell phone and with a one-button dial call Adam to see if he remembers. He thinks its in the basement. In fact, he's pretty sure the last time he saw it was in the basement. I say, that I remember moving it somewhere to get it out of view because we were having company, but I was thinking about a thousand other things at the moment, so the location didn't get stored in my long-term memory. He says, don't worry, we'll find it. It's somewhere. We hang up, and I decide I'll have to skip that page until the mat turns up. I had wanted to scan it to include it in the scrapbook.

Oh, well, don't want to waste any more precious scrapbooking time, so I return to my hovel in the dining room. I adhere the pictures to the photo mats with Tape Runner. Then, I journal under the picture of [word for person who serves at wine tastings]. I use journaltopia to help me write in a straight line as opposed to a half-smile or frown like on chalkboards. I pre-selected brown from the classic set of fine-tip pens as my ink of choice. I'm at a point now when I absolutely need to know what the word is for a person who serves at wine tastings. I run upstairs to my computer and do a quick search. I learn that a sommelier is a person who pairs wine with food in restaurants. Also, this seems to be a common question among wine drinkers. What is the server called? Most people liken them to bartenders, thus winetender. This works for me, so back downstairs, I complete the caption. After finishing that, I adhere everything else. (image 5)

image 5

Onto page two. I cut and adhere background paper as before. Next, I use my patterns n pens to draw lines on the Biltmore "journal box," then complete the journaling, still with brown ink from the classic set. Then, I adhere the clear sleeve with wine sampling menu using frosted splits. I use frosted splits because they will be more translucent than regular adhesive. I mat the photo using tape runner, then add the caption underneath. Next, I adhere the receipt from my purchase, followed by the journaling box. Lastly, I add the snippet from the brochure, placing foam dots underneath to give it some relief.

I wipe the photos with my polishing cloth, add page protectors and that makes this hunt over. Anyone know a scrapadermist?

image 6

Tuesday, October 16, 2007

The Cellars

Labor Day Weekend


I took a break from the scrapbook for a bit to work on the invitations for my mom's surprise 60th birthday dinner. I'm happy to say she was surprised, and the event went very well!


Now that the invitations are finished, I return to the Biltmore scrapbook. It's Labor Day. Adam and I took Summer to Ft. Smallwood Park for a bike ride and picnic earlier. We've returned in time for Summer's nap.


This page is a continuation of the tour - to the cellars of the winery. I have four pictures for this page, so conserving space is a must. (image 1)


Image 1
I decide not to use any photo mats for this page. However, I do need something to provide background to the photos. I check my paper options. I don't want something too busy but definitely want something that will go along with the subject matter of the pics. I have two choices: a piece of 12 x 12 floral vellum and a piece of 12 x 12 burgundy with types of wine in gold. I decide I'm going to cut strips to go behind the pics, in a sort of off-cross shape. I decide the floral vellum will work best since there are flowers and vines in the pics, and since there's a speckled pattern on the gold dust refill page.


The best pic of the page is of Jen & Leslie in front of the cellars sign, so I position the cross part of the strips directly under that. (image 2)


Image 2I'm planning on journaling for this page, but I'll have to create my own journal box using a template I received at a previous Creative Memories event. As for the color of the paper, that is a toss-up between something muted (like beige or brown) and something bright (like fuschia or green). I test beige and fuschia. Fuschia is too bright and beige blends in too much. So I consider light pink, which seems to work well. I cut the size I need with the personal trimmer. Fortunately, I had nearly the right size scrap leftover from doing the invitations. I draw the lines using the aforementioned template and fuschia fine tip pen (another freebie from a previous event). (image 3)

Image 3 I was so pleased with the numbers I cut for the invitations, I do them again with light pink and salmon paper from the pink paper pack, spelling "The Cellars."


Time to start dinner. Our neighbor Joe is coming over.


(Sept. 5 - Wednesday evening)


Adam is off work this week, so he and Dad put the frame of the shed up today. It's very exciting to see it come together. It's going to give us some much needed room in our basement.

It's evening. Mom and Kathy are here, and we are all hard at work on our projects. Mom needed to make a couple of things into stickers using my sticker maker. Kathy ordered some refill pages and tape runner.


I ask Kathy what album she will work on next. She says high school or recurring album. "The high school album has remnant newspaper clippings, so it is not really a scrapbook." Sure it is, I say, that is exactly what a scrapbook is! Kathy comments that the page protectors only cover the refill pages between the reinforced edges. She had not been trimming the 12 x 12 paper to fit, but will start doing so.


I trim the pic of the hallway to the champagne cellar because the salmon letters I cut overlapped it slightly. I just cut the foreground set of letters in pink, and I adhere them together with the mini tape runner. I goof on the letter "E" and put the adhesive on the wrong side, so I carefully remove the adhesive using the pick-up square. When all the letters are done, I write my journaling with the fuschia fine-tip pen.


Image 4

Kathy is getting ready to leave. Adam offers to carry her stuff. "If I can't carry it myself, I shouldn't carry it," she jokes. "I have a suitcase on wheels; it's just not big enough!"

Now, I'm ready to adhere everything. I use frosted splits to adhere the vellum because they "disappear." I use tape runner & mini tape runner for everything else. I wipe the photos with my polishing cloth. I place a few foam dots on the die-cut of the champagne bottle and adhere it. Then, I slide the page protector on. Another page bites the dust (but not off the wine bottles).


Image 5

Sunday, September 23, 2007

Clubbing and Touring

Tonight is Crop Club. Mom & Kathy - my most faithful customers - are here. Summer is asleep (at least, she is trying to get sleepy!). Right now, she is laughing, but she'll settle down. I just finished professionally cutting three-inch daisies for Kathy. Now, I turn my attention to the next page in my Biltmore album.

This page continues with pix of the Winery tour, and I want to keep this one as simple as the last. I decide to mat the pictures using the old trick of bringing out subtle hues in them (image 1).

Image 1
I select the mats from the Cottage Storybox. The battery in my camera is dead, so I have to recharge it before taking any more pictures, so I take this opportunity to do a little paging (my term for staging a scrapbook page).

In my stash, I know I have a small 3-D sticker of barrels that will go with this page and several large 2-D stickers of wine corks. I'm not planning much journaling for this page, and I'm planning to keep captions minimal. I find another epoxy sticker with a quotation on it that also might work well on this page.

Kathy ponders, "Why aren't there ever any icons on Father's Day stickers of the stuff that my dad does? There's just golf or fishing." I say, "Yea, they should have a TV. That's universal."

"Or computer," Kathy offers. I joke, "I doubt they'll ever have any firearm stickers!"

I consider background paper as well, but ultimately decide against it. It's tempting to want to use printed background paper with every page, but often the print will visually usurp the photos, which should bve the focal point of the page.

Mom needs help cutting paper. She's cutting a mat for Ethan's sonogram. I show her my pencil technique, then suggest using a photo sleeve or sticker sleeve to hold the sonogram. Sonograms are printed on facsimile paper and will deteriorate quickly if left to the air, particularly where it's humid. So, it is advisable to protect them within a scrapbook using a method called encapsulation. Another option is scanning but sonograms are very grainy and scanning could further obscure the image.

Looking through my pink project tote, I find a leftover strip of background paper I already used that combines all the colors of my photo mats for this page. I add that to the layout (image 2).

Image 2

The epoxy sticker I've chosen will leave a large amount of white space if I apply it solely. So, I decide to give it a little help by cutting a semi-circle with one of the circle patterns and custom cutting blades and mat. I choose the same purple as the photo mat. I add the circle to my layout. (image 3).

Image 3
Mom makes a mistake in her journaling. She writes "all pictures taken in Odenton" but one wasn't. One was taken @ St. Agnes Hospital. I suggest that she write in parenthesis (except 6 mos).

About this time, my camera battery has recharged, so I take all the photos up to this point. Then, I number and title each picture (1 - Fermentation; 2 - Barreling; 3 - Corking), adhere all items to the page, including the small 3-D sticker of barrels. Next, I add the cork stickers.

Mom wants some Ebony ABC/123 stickers. I go upstairs and get her a set.

The last element is journaling. I'm having a good handwriting day, which I'm glad about. I can't decide on just one ink color, so I use a combo of three to correspond to the photo mats. I choose purple and periwinkle fine-tip pens and petina precious elements pen. I normally just dive right into writing, but because I'm writing directly onto the page aand because I want to use each of the three ink colors as equally as possible, I scribble a draft separately first (image 4).

Image 4

After writing, I decide to carefully lift and move the barreling pic and mat to the right to make everything a little more symmetrical (image 5).

Image 5

That completes this page! I wipe photos down with the polishing cloth, slide on page protector!

Thursday, September 13, 2007

Favorite Page and Favorite Tool

[August 19, cont.]

I already have the basic layout for the next page. The colors in the elements make it easy for me to come up with embellishments, which will be two epoxy stickers (image 1).

Image 1
I speculate that I'll professionally cut some fall leaves to go with the theme of the page - probably brown, yellow and a few red or orange for a punch of other color. I also want to put "then" and "now" beside each of the images of the dairy barn and the present-day winery.

But it is time to quit for the night. I have to be able to keep my eyes open!

[August 20]

Summer is napping. I just put the folded clothes away, and now I'm ready to get back to scrapbooking.

I cut the leaves as planned, deciding that orange is too bright for this muted color scheme, nearly monochromatic. I choose yellow and brown instead, mat the postcard on brown (from the Colonial paper pack) to "lift" it off the page a bit. I write the description from the back of it onto a yellow journaling box from Cottage Storybox using purple fine-tip pen to go with the text in the cutout from the brochure (a surplus from previous page). (image 2)

Image 2
Now, I'm ready to adhere everything. First, I need to turn my cutout into a sticker using my sticker maker. I make faint tick marks on the page where the sticker will go to ensure the layout isn't skewed. A pencil is my cannot-live-without tool. I use it for aligning things, making the right size cutouts, drawing outlines, etc. It's indespensible! I use a No. 2 pencil, but I'd highly recommend a photo labeling pencil, as it will not harm your photos if the pencil were to come in contact with them.

My sticker is ready so I carefully paste it to my page. Next, I apply the postcard using tape runner, then the journaling box. I use the mini tape runner to adhere the leaves. Doing this page is making me eager for the crisp autumn air to arrive and for those slightly chilly mornings perfect for leisurely sipping coffee.

After applying the leaves, I adhere the two epoxy stickers, which give the page a little dimension. Now, I'm ready to add the ABC/123 stickers in wine, using Titletopia. I pull out my trusty multi-purpose tool and clips. Clips hold the Titletopia aligner and backing sheet together while the multi-purpose tool helps me place the ABC/123 stickers onto the backing sheet (image 3).


Image 3
I'm using all caps for the "then" and "now" because subconsciously I think caps contributes to the bold, curt statements. I transfer the THEN stickers to my page and immediately repeat the steps for NOW. With the transfer of those letters complete, I've made quick work of this simple, yet favorite page (image 4).

Image 4

Sunday, August 26, 2007

Bottle"Toe"ing

(Aug 19) It's Sunday morning. Summer is watching Boz - her favorite. Adam is washing cars - his favorite. And I'm scrapbooking - my favorite! Kathy is here also, enjoying a rare Sunday off. She is "retrospecting" as she calls it. When she's caught up on her other scrapbooks, she goes back to pix from high school. "I may have to run home to get more," she says. Oh, if only we were all as accomplished!

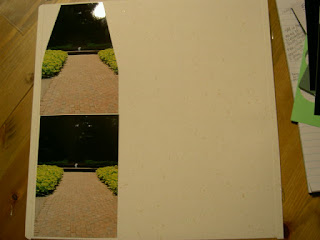
We had a cookout yesterday for Adam's birthday. As customary after we entertain, I get my stash out of "hiding" again. I go through my pix and separate the next group, which is of the Winery Tour & Tasting. I separate these pix into four groups and plan approximately 3 - 4 per page. The first group is arriving at the Winery. One pic is of the fountain in front, which is kind of drab (not exactly Old Faithful here). So, I'm thinking of turning it, along with one of its twins, into a border of sorts or cropping the pictures along the lines of convergence (also known as orthogonals). (image 1)

Image 1
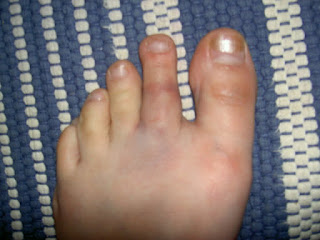
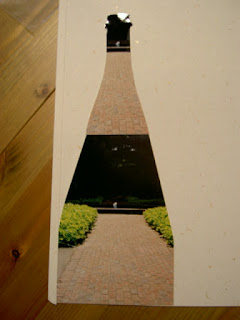
Inspiration strikes me and I think the fountain bubbling up mimics a bottle of bubbly being uncorked, so I search for ways to turn my pic into the shape of a wine bottle. I think of some of the cutting patterns I have. They are in a basket on the buffet. I set my laptop on the basket earlier, so I grab the handle of my laptop case without checking to make sure the bottom flap is fastened. It isn't. Before I can react, the laptop drops out of the case and lands squarely on my middle toe on my left foot. OUCH! I try to refrain from cursing and simultaneously pray that the laptop is not broken or altered in any way. I get some ice on my toe and take a short break from scrapping (image 2).

Image 2
"All in the name of scrapbooking," Kathy says, laughing. "Yes," I concur, "creativity comes with a price." While I'm nursing my toe, Kathy suggests I use a piece of background paper with a wine bottle on it, trace the outline on a thin piece of paper, then use it as a pattern to cut out the shape onto my picture. I work on this while the ice rests on my toe. The outcome is really better than I expected (image 3). Unfortunately, I can't say the same for my toe.

Image 3


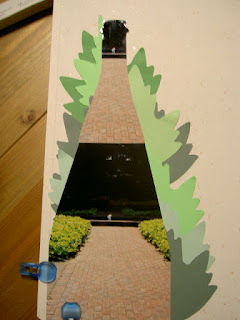
We take a lunch break (cookout leftovers!). Adam gets ready and leaves for work, and I put Summer down for a nap then get back to scrapbooking. I decide to put some type of background behind the "bottle" and I'm sure I want it to be green, so I rifle through my stash of paper and find three shades that would work. However, I don't want the background to just be an outline of the bottle, so I think I'm going to try to outline the shapes of leaves to mimic the plants in the picture. Fortunately, I have a stencil for this that I received as a giveaway at a previous CM event, so I get to work.


It takes me quite a while to cut the leaves and arrange them in a natural fashion. To get them just right, I lay them all down and clip the bottom of the picture bottle to my page with the Multipurpose Clips so it remains still. I mark with a pencil on the page where each leaf will rest and number them in the order of adhesion. Right about this time, Kathy leaves to go to Wegman's with a friend in Owings Mills. "Hope you get done before Summer wakes up. See ya Wednesday for Crop Club," she says.


Once I have the order worked out, I adhere everything to the page with Tape Runner. I add a few foam dots under a few of the leaves to give the border some relief. It's not perfect, but I achieve the desired effect (image 4).image 4


Now that that is finished, I turn my attention to the rest of the page. I have an image from one of my brochures that I want to use here. I've already cut that out with the Multipurpose Scissors so I play with the layout a bit. I really don't want to cut up the piece from the brochure anymore so I try to get it to wrap around the "bottle" and the leaves. A bit of the edge is still visible behind the leaves and I want it to appear more seamless, so I cut an edge from one of the leaf outlines and plan to paste that on at the end (images 5 + 6).

image 6image 5
I consider rounding the corners of my photos using the Corner Rounder, but only if I don't mat them. I test a mat behind the second pic and quickly realize that it will overlap too much with the image from the brochure. Summer's awake so I break and will pick up later this evening.

Summer's now asleep for the night and the dishes are done, so I return to the page. While I was giving Summer her bath this evening, I changed my mind about putting the cutout from the brochure on this page because I remembered I had a black and white postcard to use with the Winery pics. It will fit nicely with the cutout and a journal box. That leaves me with two pictures, room to do bubbles at the top and some journaling.

I work on the bubbles first. I cut a strip of French Vanilla paper and punch bubblesd using the Bubble Maker on the left side of the strip. Then, I apply Tape Runner around the holes and affix scraps of Fog paper to the back. This gives the allusion that the bottle has just been opened (image 7).
Image 7
I decide to mat the bottom photo and add a journaling box at the top from Cottage Storybox. I jot down a couple of captions on teh box with the Patina Metallic Pen. (I tested two other green colors but like Patina best.) I adhere everything to the page, wipe down the pix with the polishing cloth, slide on a Page Protector and done (image 8)!

Image 8

Tuesday, August 21, 2007

Mystery Border

Image 1
(Saturday, Aug 11) I work on these next pages together as two-page spread. I layout the photos and postcard in rough arrangements for each page (images 1 and 2).

Image 2I make a few quick mental notes: use the epoxy sticker "Vineyard Adventures" as a title and use the postcard for page two, use the vineyard 3-D sticker as an accent, use the "A Taste of the Good Life" sticker as journaling box for the first page, use the blurb on the back of the postcard as journaling for page two.


Image 3For the first half of the spread, I try three colors of photo mats before ultimately deciding that maize makes the pictures pop moreso than the other two colors (image 3). However, it's late and my eyes are getting heavy, so I must go to sleep.


(Sunday, Aug 12) Uncle Sal, Aunt Tracey, Josh and Stacey came over earlier today. Tracey was showing off the pictures she took during her trip to Europe (Italy, Greece, Turkey, etc.). Stacey was seeking succor on an embellishment for her save the wedding date cards. After visiting with them and putting Summer to sleep for the night, I steal a little more time to work on the Biltmore album. Mom, my ever-faithful scrapbooking companion, is here also.


Picking up where I left off, I decide to utitlize some more of the Biltmore tissue paper for part of the background of at least one half of these pages. I also think I might round the corners of the pic of the Inn with the corner rounder. With my plan roughly in place for page one, I turn my attention to page two.

Image 4Since I'm using a postcard on this page, I want to write the postcard description on a journaling box from from Cottage storybox. I'll put this to the left of the postcard because I want to do captions for the two photos. In keeping with the color scheme of page one, I choose a maize journaling box (image 4).


Mom is ogling the pages she has done. "I'm so proud of these," she says. "You should be," I say, "You've worked very hard on them." The pages are particularly gratifying for her because of the anticipation she's built up over the last few months of doing them.


I know I need to hand cut a mat for the postcard. It's slightly bigger than a photograph and the storybox mats aren't quite big enough. Adding a mat to the postcard will lift it off the page a bit and keep the eye from wandering off the page. When selecting a color for a mat, I've found it's usually best to select a subtle color from the image to bring it out. This allows the image to pop off the page a bit more. Now, if it clashes too much with the overall color scheme, then try the next best hue. I select a sheet of paper from the Colonial paper pack. The easiest way I've found to cut paper to perfectly fit an image is to mark it with a pencil. A pencil is my one indispensible tool when I'm scrapbooking. Primarily, I use a pencil to mark positions on a page and to measure cuts and, of course, to make notes. Pencil marks are easily erased, leaving the page and cutouts pristine. Small caveat: I do not recommend using a standard No. 2 pencil or pen to write on the back of photos. Over time, this will deterioriate pictures. Instead use a photo labeling pencil.


An idea for a cute border is working itself out in my mind. I found a long sticker of leaves in my stash that would correspond well to the leaves I'm planning for page one. As for the other part of the border, I'll have to leave you in suspense. Hey, gotta keep you reading!


Image 5I adhere everything to page one, including the stickers, but because the journaling box has a glossy finish, I have to wait for the ink to dry before applying tape runner to the back (image 5). Meanwhile, I make punches for my mystery border and adhere them to the page by first applying tape runner to the page, then placing the punch-outs over the adhesive. This saves me from trying to apply adhesive to each little punch-out.


I adhere my pictures to the page, then commence with the captions, using Journaltopia Writing Guide to ensure my writing is straight. I choose the purple fine-tip pen to write the captions. Mom suggests I add little twigs to my mystery border with a pen for an added effect. I test all the green colors I have on a piece of scrap paper, but none of them are the right color. I decide to use brown instead.


Image 6I adhere the now-dry journal box to page one. Then slide the page protectors on both pages, and I'm done! (images 6 and 7) Not a moment too soon either - Mom is packing up her stuff which is a sure sign it's bedtime!

Image 7


Image 8The grape vine border mystery revealed: I used an average, ordinary hole punch to punch out "grapes" from a scrap piece of paper. Before removing the leafy vine sticker from its backing, I hold it up to the page about where I want to adhere it. Using my handy, dandy pencil, I mark on the page where the "grapes" will be most visible. Over the pencil marks, I put tape runner onto the page, then apply my punched out "grapes" over the adhesive. Next, I added the leafy vine sticker to the page followed by squiggly twigs with my brown fine-tip pen (retired product). (Image 8)

Monday, August 13, 2007

Vine Design

The School Times workshop went well today. I had to take a break from the Biltmore album to complete the school album for Summer (and the others attending the workshop). I'm excited to have that album ready for adding pictures when the time comes, which is only 3 years away!

After clean up and and some time spent with Summer before her bath and bedtime, I'm ready to continue working on the Biltmore album. Mom - my official scrapbooking buddy - is here with me. She is no longer a virgin scrapbooker, and, after spending many months organizing her stash, she completed 4 more pages today during the crop! "You are officially hooked," I say. "I watched you grazing around our scrapbooking table, your mental wheels turning with ideas and anticipation for applying them to your next pages." She quickly agrees, and, with that, we sit down to start another session.

For the next page in the Biltmore album, I have picture choices to make. There are nine pictures in this group, which include our walk from the Inn down to the Winery after breakfast. I anticipate that these pictures will probably comprise the next three pages. There is one duplicate, however. When using my 35 mm camera, I sometimes take two pictures of the last exposure on a roll, not only in the event it is one of those half-exposed frames but also to help me keep the rolls in the proper order.

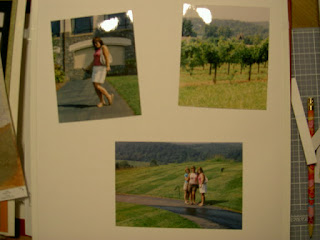
I might be able to get all of this pictures into two pages. It depends on if I do any cropping or not, which generally if I do, it is not much. I start with the first three pictures and check my stash of memorabilia. I consider a postcard of the 70-acre vineyard as well as an image of a breakfast table from one of my brochures. Turning my attention to stickers and other embellishments, I note that I have a 3-D sticker of a vineyard, a background paper with a vineyard that I could use as background, and a couple epoxy stickers with appropriate phrases. I group all of these items together before I start the page much like Candice Olsen from Divine Design (on HGTV) collects all of her inspirations, textiles, etc. into a wire basket before sketching anything.

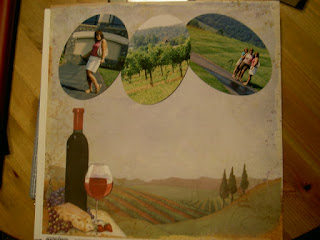
Image 1With the personal trimmer, I crop a little of my photos out, not much, just a little excess sky and ground (image 1). I consider ovaling two of the pictures with the oval cutting patterns, and, for a brief moment, think that a trio of these would make a nice "cluster" of grapes. I fear that the grandeur of the landscape might be lost if I do that. Image 2After a bit of contemplating, I decide to go for it anyway because it would be a nice effect. If I don't like it, I reason, I have two more copies of each picture, and I can start over! After completing the oval cuts with the custom cutting system mat and blades, I decide it was a good move (image 2).

At that moment, Mom blurts, "Oh no, I made a mistake!" In filling a family tree page, she incorrectly wrote a name in one of the spaces. Her page is a light green color, so the write-again correction paper won't work. Thinking for a minute, I say, "You can cut some green paper - a slightly darker shade than the page would be fine - the same shape as the openings, and place the strips over the spaces for all the male names. This way, it would look uniform and like you intended to do it that way." She likes this idea, so we hunt for an appropriate color of paper. I have some in my scraps stash, so she measures and uses that. "I have multitude of solutions up my sleeve," I say, "only because I've made so many myself!"

Back to my page, I trim the background paper using the 12-inch straight trimmer and custom cutting system mat and blades. I start thinking layout again and wonder how I can mimick stems and leaves for my "grape" pictures using paper and pen. I check my stash of green and brown paper. I have a sheet of green that could work for a leaf or two, but I quickly determine that the leaf would obscure the pictures too much, so I nix the leaves idea. The branch idea would work well, though, so I hand tear a strip of paper-bag brown paper to place at the top of the page above the photos.

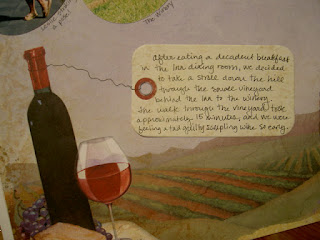
Since this page is already "busy" with the background paper, I save the other embellishments for the two upcoming pages. Now, I think journaling. I don't have much journaling to do about the actual walk, just where we'd been and where we are headed. I can make little annotations of each picture under the pictures. I find the perfect journaling box that looks like a tag but with a worn texture. I scribble my thoughts on it with a black fine-tip pen from the basic set (sadly, neither Mom nor I have sugarplum, which would have been perfect). Now, I'm ready to adhere everything.

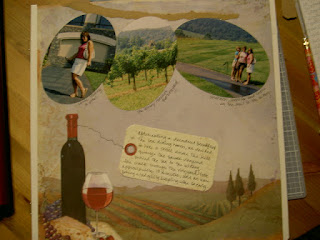
Image 3I add a string from the bottle to the tag with the black fine-tip pen. I add a few captions to my pictures and this page is history (images 3 and 4).

Aside: In the first picture, you might have noticed a slight imperfection on the Image 4reinforced edge of my white refill page. Part of it tore some day ago when something with a sticky backing accidentally landed there and I tried to remove it. To conceal the tear, I place a strip of write-again correction paper on it to hold it down and now it's barely noticeable. If you didn't notice, then my trick worked, but I still wanted to share the tip!

Thursday, August 2, 2007

Biltmore Rewind

Some of you asked me if this is where I started in the scrapbook. The answer is no, it is just where I started blogging about it. For those interested, here are the preceeding pages to the blog entry pages.


Opening Page

For the opening page, I wanted to keep it simple. No pictures adorn this page, since it acts as a title page. For the background, I cut to size tissue paper that the winery packed in my shopping bag at checkout. Many retail stores do this as a way of protecting merchandise once it leaves the store. It's a great memento to save from trips to use in your scrapbook later. I wrote a brief background of the trip (why I went, who I went with, etc) on white ruled paper and then mounted it on a printed sheet from the shades of purple pack. I purchased the stickers that adorn either corner of the journal box at one of Biltmore's gift shops. I created the title using some pre-cut letters and adhered them onto a solid sheet from the shades of purple pack, then cut around them. A three dimensional grapes sticker finishes off the page.


Inside Cover


I saved a note my friend Leslie mailed to me two months prior to the trip. Since this took place before the trip, and I had nothing else to include with it on its own page, I adhered one of the plastic sleeves CM stickers come in to the inside cover of the album, and placed the note card with envelope in the sleeve. Now it is the first item in the scrapbook. I could have also used an 8 1/2 x 11 portrait sleeve or a 7 x 7 refill page to showcase this item.


Page Two

This was a really fun page to do. It was a bit challenging because I had so many elements to fit onto it. I kept the luggage tag, bag claim receipt, boarding pass jacket and boarding pass stubs from the trip. I chose an orange background paper to visually bring out the gate flight number and destination in the picture. Since there was so much space on the boarding pass jacket that didn't need to be visible on the page, I used it as a sub-background for the bag claim receipt and boarding pass stubs. I arranged all the items loosely onto the page, and started adhering everything. To get the brown airport tag at the bottom of the page positioned just right, I used my trusty pencil to mark where the eyelet would go, while everything was laid out on the page. Then, I punched the hole for the eyelet into the journaling box and attached the tag. I did all of this before writing anything on the journaling box. For the title, I used the titletopia wavy template to align the stickers. For the circle charm to the right of the title, I tied a piece of the blue tape runner strip (stuff you're left with after tape runner is used) to the charm, then used a 3-D dot to lift it off the page.


Memorabilia

Portrait sleeves are great for storing bulky or oversized mementos that you still want to remove and look at but also include with the scrapbook. I used a 12 x 12 portrait sleeve and stored some of these mementos on both sides. Another alternative would be to use the CM sticker sleeves, adhere them to your page with the flap side facing you. However, you will still need to remove the page protector, if you've used them, to access the mementos this way. The CM sticker sleeves are also acid- and lignin-free, so they will not harm your pictures in any way.


Page Three

For this page, there were two pictures I wanted to use. We had a spectacular view of the Inn @ Biltmore Estate from the parking lot of the Moose Lodge (where we ate after arriving - it was the first place we stumbled upon - a fun rule to have on trips). I also snapped a picture of the license plate of our rental car as well. The mementos from this page came straight from our room at the Inn. When I stay in hotels, I take everything that even remotely resembles paper. Doing this adds to the amount of periphernalia that I bring home, but some of these treasures are wonderful accents to a scrapbook. In this case, I took the paper lids covering the glasses in our room. I also took one of the notepads as well. Notepads inevitably identify the establishment in some way, and they make excellent "journaling boxes" for a scrapbook. To get the paper lid to lay "flat" I cut it at equal intervals along the circumference. Then I used some slightly raised 3-D dots to give it some relief. I used my circle template pattern to make the circle behind it. Then (so as not to waste the paper) I used the outline of the circle to highlight my makeshift journaling box. The final memento is the guest access card they gave us during our stay. I raised this with 3-D dots as well.


Page Four


By this point, you're probably wondering if I took any photos of myself and my friends while there. Of course I did! For this page, I knew I wanted to journal about what Shannon said after we passed through the Lodge Gate, so I first staked out a spot for my journaling box. Since I didn't get any pictures of the Lodge Gate, I used one of the many postcards I purchased while there. Postcards are a great way to fill in any gaps in your scrapbook where you may have neglected to snap a photo. I wanted to make sure that the description on the back of the postcard was visible as well, I wrote it out on scrap piece of paper and placed it above the postcard. Another way to handle this, if you have room, is to photocopy the back of the postcard (darkening it, if necessary) and place that next to the front of the postcard. Incidentally, I did try this, but the text on the back is a very light green, and no matter how much I darkened it, the text just didn't show up well. If you are including postcards that you or someone else has written on in your scrapbook, I would highly recommend copying the backs. For the photo backgrounds, I used a pink and sage sheet of photo mounting paper from a now discontinued storybox. Finally, I include a sticker about friendship, raised with a couple of 3-D dots. (Friendship grows like a garden bouquet.)


Page Five

We ate at the Bistro near the winery the first night there. I found some cute background paper that features "high-society" ladies in wide-brimmed hats at some kind of tea or club event, socializing (i.e., gossiping). I thought this would go perfectly with this scrapbook. I mount the photos with purple and green mats from the Everyday storybox. On the center photo, I add four green eyelets to the corners. I use a journaling box from the same storybox. I use a piece leftover from trimming one of the mats to support a vellum accent from the Expression of Family and Friends vellum accents pack. To further embellish the page, I add wine bottle and stemware stickers to the page. The bottles are raised with 3-D dots. For the title, I use another scrap of a green mat and cut out the outline of some black letter stickers. I adhere them to the green paper with the tape runner.


Page Six


Leslie is forever misplacing things, and she didn't let us down in Asheville. No, nearly immediately after arriving, she realized she lost her cell phone. This was such a humorous part of our trip, that I wanted to devote one page to journaling about it. I used a sheet of background paper with wine bottles, flutes, etc on it. Then I cut a sheet black ruled paper (now discontinued), and began recounting the events, from the moment she realized the phone was gone to the moment we "found" the phone (it was never really lost). I cut a die-cut of a cell phone from my special machine, and accented the journaling box with it. Below that, I included two experimental photos I took using my cross-hatch filter (Jennifer and Shannon sitting outside the winery). I captioned the photos by tearing a scrap sheet of yellow from the Shades of Yellow paper pack and placing a sticker of a camera next to it.

Now you are all caught up!
Related Posts with Thumbnails