After having my fill of the renown Maryland crustaceans, I build upon my idea of the stemware-shaped pictures and cut a piece of sand cardstock with the multi-purpose scissors on a slight curve to form the shape of a table for the glasses to rest on. Unfortunately, the shape obscures part of the background paper image. To bring it to the foreground, I use the multi-purpose scissors to trim around the stem on the glass so when I put the "table" down, I can lay the glass over top. (image 3)
Wednesday, December 23, 2009
How to Crop a Wine Glass
After having my fill of the renown Maryland crustaceans, I build upon my idea of the stemware-shaped pictures and cut a piece of sand cardstock with the multi-purpose scissors on a slight curve to form the shape of a table for the glasses to rest on. Unfortunately, the shape obscures part of the background paper image. To bring it to the foreground, I use the multi-purpose scissors to trim around the stem on the glass so when I put the "table" down, I can lay the glass over top. (image 3)
Tuesday, November 24, 2009
Droppings and Scrappings
Sunday, November 8, 2009
Scrap Rap: Autumn/Winter Edition
Bulletins – Need-to-Know Info
Specials
New products for autumn/winter – Heather’s Top Picks
Tip of the Month – Fun with Fonts
What I’m Working On
__________________________
Bulletins
I’m moving Scrap Rap to my blog for easier reading. It made sense for me to combine both of these communications into one location. By posting Scrap Rap here, I can also add links, formatting and sound bites that I wasn’t always able to via e-mail. I realize fewer and fewer of you are truly reading e-mail these days, so this way, the newsletters are always accessible!
My blog is now available as a podcast. You may have noticed the little icons throughout the page. You can subscribe by clicking the link on the right side or you can visit my Odiogo Page to subscribe and listen on the go. The podcast is also available free through iTunes.
The former Creative Memories Photo Center is now the Creative Memories Digital Center. The new URL is creativememories.com/digital. New features include: 10-minute gift ideas, click-to-enlarge tool for easier viewing, slideshow feature for viewing photos and storybooks, new “my projects” section, new flipbook feature, highlighting digital product ideas. Check out the specials available on this site just in time for the holidays.
Specials
#1 Receive FREE Winter Reflections 8-Sheet Paper Pack with any purchase over $50* (while supplies last)
#2 FREE gift wrap for any offline purchase now through December 31, 2009.*
#3 FREE Daisy Luggage Tag with purchase of Daisy Weekender, Project Tote or Wheeled Cart.*
#4 $5 OFF 7 x 5 and $7 OFF 8 x 8 softcover storybooks purchased through CM Digital Center (Expires Nov 30 – CM Digital ID: 94484775)
#5 FREE Jewel Paper Ribbon & Envelopes with Christmas Cards Featured Project ($27) – create 18 unique Christmas cards following simple step-by-step instructions at Creative Memories Project Center
#6 – FREE Expressions of Those We Love vellum accents with The Little Things Featured Project ($22) – create a paper album suitable for mailing to family members or friends
#7 – FREE Wavy Blade with Primary Bordermania Featured Project ($48) – create several autumn- and winter-themed borders using the included 12-inch rotary trimmer and primary autumn and winter additions
New Products for Autumn/Winter – Heather’s Top Picks
(View the new mini catalog online)
Power Palette Sets – These well-coordinated sets put you in the driver’s seat based on your time and level of interest. Each power palette now has a simple set ($25 includes tone-on-tone paper, photo mats, and journaling boxes), enhanced set ($14.50 includes designer-print paper and decorative ABC stickers), and a decorative set ($21 includes three photo-safe paper embellishments – ribbons, flowers, buttons, tags and/or frames). Items within each set can also be purchased separately.
Memory Mate Daisy Totes – Weighed down by scrapbooking baggage? Travel in style with CM’s new versatile organizational totes. Whether you need a little or a lot of storage, CM has the solution. Choose from Daisy Case, Daisy Weekender, Daisy Tools Caddy, Daisy Project Tote, and Daisy Wheeled Cart. There’s also a coordinating luggage tag that you can use to identify your stash! ($15 - $145)
Custom Cutting System Jumbo Oval Pattern ($14.50) – great for creating your own decorative cardstock!
Pocket Snowflake Punch ($12) – Folds down for easy storage and makes solid snowflake shapes
Check out all the new items on my website. (Choose “Shop Products” from the top navigation menu. Then choose “New Products” from the left navigation menu.)
Tip of the Month – Fun with Fonts
Creative Memories uses a variety of resources to create its printed and electronic pieces. If you are looking for fonts to use in your digital layouts or on vellum, consider searching online for fonts that have unrestricted use. To learn about fonts and font usage, consider the Fun With Fonts (PDF) handout.
Other font sites:
About Desktop Publishing
All Good Things Typography
All Graphic Design
Dafont
Esperfonto Typeface Selection System
Font Garden
Linotype
My Fonts
Veer
What I’m working on
Those reading The Scrapbook Stand know I’m continuing to work on a traditional scrapbook (12 x 12 Album) of my trip to Biltmore Estate. I’ve completed 11 more pages, and I'm nearly finished. My goal is still to complete it by year end (hey, I do have until the 31st!)
I have one of those traditional store-bought photo albums where I’ve been storing my pix from the 2001 trip to Kauai, Hawaii. Well … not surprisingly, it’s falling apart. Those things have a short shelf life, unlike CM albums which are guaranteed for a lifetime. So, I’m using one of CM’s PicFolio Max covers, pages and memorabilia pages to transfer the photos and also incorporate my memorabilia. Fortunately, I did write captions for the pictures, and I've already planned the layouts, so all I really have to do is trim a few background papers (like Tiki, Aloha, Delight Surfer Girl and Delight Designer prints), add titles and re-scribe the journaling using photo-safe fine-tip pens. I also kept a 35-page journal while I was on the trip, so it will be great to incorporate those memories also. Once completed, I'll have added 62 pages to my page completion challenge total!
I made a few baby journaling boxes for a surprise baby shower for one of my co-workers at the office using cardstock, some of the delightful paper flowers and the scallop maker. I solicited “tips from the trenches” from other co-workers, and I added them to the Treasured Memories journal jar as a gift to her. The journal boxes will coordinate with the colors of the baby’s bedding. The tips were a big hit, and everyone enjoyed reading everyone else’s tips.
In keeping with tradition, I made Summer’s birthday party invitations also. This year, we are having her party at Kids First Swim School, where she is taking swimming lessons. I created the front with die-cuts and the tearing tool. I printed the party details on vellum for the flip side and adhered with eyelets.
Saturday, October 24, 2009
How to cut a piece of paper
I trim the rest then adhere everything with tape runner. I adhere the ivy corners with foam dots (image 6).
Sunday, September 13, 2009
Desperately Seeking Scrapbooker
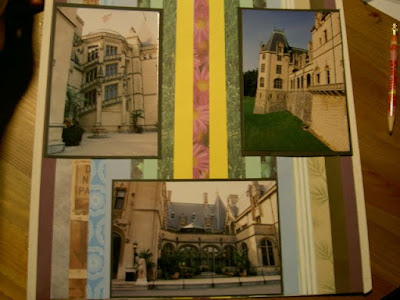
I can hardly contain my excitement. After a long self-depravation, I'm getting ready to work on a page using REAL pictures! It is my hope that my progress will speed up as a result of this change in focus. I sort through the next dozen pictures, pull out two I won't use and group them into three sets. The first set are shots of us girls on the South side of Biltmore House under the wisteria- and trumpet-creep-covered pergola. I know immediately I want to use a sheet of green decorative cardstock. (image 1)
I take a short break to spend time with Adam & Summer before he leaves for work. We play with Summer's "trainville" and do some toy chaffing (i.e., donating the unwanteds). We chat with Mammy on the phone, watch a little PBS Kids, color a picture, then eat lunch. Summer and I put puzzles together, draw and read books while Adam gets ready for work. After his truck has disappeared around the corner, I help Summer brush her teeth and go potty, then help her nod off to dreamland for the afternoon.
Sunday, August 23, 2009
Tour de Fin
Scrapbooking tools are not just for scrapbooking
It's somewhat of a misnomer that scrapbooking = scrapbooking. The paper kits and tools we've come to associate with that hobby have multiple purposes. Here are just a few ideas, for those who don't scrapbook per se but may have dappled in the occasional paper craft or two:
- for the student - if you have school-age kids at home, then you have no doubt received more than a few pleading expressions from them, begging for your assistance with last-minute assignments. Cutting tools, punches and adhesive are time- and hand-saving catalysts for these projects.
- for the avid photographer - got photos? If so, you probably need a safe place to store/organize them, and I don't mean tupperware or shoe boxes! Power sort boxes can hold from 600 - 2400 5 x 7 photos, and they'll be protected from harmful deteriorants (humidity, sunlight, dust) for many years. In addition, Memory Manager 3.0 can quickly find and sort digital images as well as automatically backing them up, so your images are always there when you need them.
- for the card-maker - If you enjoy making your own cards and gift tags, you'll go wild over the multi-themed paper ribbon/flowers/buttons/frames, tag maker, tearing tool, cardstock and vellum accents.
- for the custom gift-giver, decorator and party planner - Like giving the perfect gift, especially when it's customized? Then, you'll enjoy the CMphotocenter, where you can create wall posters, calendars, personalized poems & frames, and photo panels.
- for the classroom - teachers will love the punches, cardstock, and cutting patterns for creating everything from calendars to bulletin boards to art projects. My friend Kathy, who teaches pre-schoolers, recently created a Teddy Bear's Picnic bulletin board using some of the CM tools. With the personal trimmer, she measured and cut 4 x 4 squares to create a checkerboard pattern. She also adhered some of her items with tape runner and outlined the food shapes with round-tip pens. (image 1)
You may have thought I gave up on the Biltmore Estate album. There are times when I've thought that myself given all the distractions, side projects, etc. However, it's not true. I've been moving along and recording my progress, it's just taken me a while to translate it to the blog. In fact, since my last Biltmore post, I've completed 11 more pages. A few of them are not without surprises, so stay tuned!
The next page I work on is the basement level in Biltmore House. The "tour" portion of the album is nearly complete. Since I've been alternating between the former 12 x 12 gold dust refill pages and former white refill pages, this page will be in gold dust. (Not sure if I mentioned that before or not.) That's one way to change things up a bit: alternate style of refill pages. The textured refill pages like Spargo come with a built-in background.
I've got the basic layout of this page, which consists of the main kitchen and servants' dining room. (image 2)
I found one of the pictures of the kitchen online and printed on my Kodak printer. The others are postcards. I hem and haw about whether to copy the descriptions from the flip sides of the cards, but know I don't have room for both, since I have the vellum accent for the kitchen, I opt to include the dining room card description, if I have nothing else to journal.
If you're stuck (scrapper's block), start with what you know. Often, completing those elements will inspire the rest of the page. For example, I know that I want to mat the Kodak-printed photo with black card stock. So, after measuring and trimming the mat with the 12-inch straight trimmer, I decide to reprise the gold/black palette from a previous page. I trim a strip of gold metallic paper to charge the vellum accent. (image 3)
Next, I start thinking about the title, but scrapper's block consumes me once again, so I pause for the day.
[Wednesday, June 10, 2009]
I don't have much room, so ABC/123 stickers won't work, but just handwriting it isn't enough. I decide to compromise and use one of the brown monogram swirly stickers for the initial letter, then hand write the rest. I adhere the letter to a piece of peach cardstock. With the petina fine-tip pen, I hand write the balance of the letters on mediterranean cardstock. I cut another piece of mediterranean cardstock and using Patterns & Pens (former CM gift), add lines in the same color of ink. I adhere everything with tape runner, journal, and add page protector. (image 4)
Sunday, July 26, 2009
What kind of scrapbooker are you? Take the quiz.
When you hear someone utter the word scrapbooking what images come to mind? An mammoth-sized canvas bag filled to the brim with paper, cutters, buttons and brads? A surface-abused table littered with haphazardly strewn adhesive, pictures and memorabilia?
Five years ago, those images would have been accurate. However, scrapbooking has come a long way since then, particularly since digital photography has become mainstream. These days, though, the politically correct term for scrapbooking is memory preservation. Preserving memories is no longer just chipboard, paste and glitter, but also photo organization, traditional photo-safe albums and digital scrapbooking.
To become a "scrapbooker" in the 21st century, all you really need is a computer or a set of pictures and your memories. To help you determine what kind of scrapbooker you are, I developed my own self-help quiz*. Record or remember your answers, then scroll down to see where you fit.
- What type of medium do you use most often to take pictures?
A. Film (35 mm)
B. Combo of both A and C
C. Memory Cards
D. Er ... Cell phone
E. Those black things in the middle of my eyes!
- How often do you take pictures?
A. I take pictures for a living.
B. Every day. Even my dust bunnies don’t go uncaptured!
C. During significant events (birthdays, vacations, weddings, etc.)
D. I swipe other people’s doubles or order prints from their photo-sharing sites.
E. I’ve had the same roll of film/memory card in my camera for 2 years.
- Where do you have most of your pictures stored?
A. Already in photo-safe albums.
B. In a memory preservation container or storage system.
C. In shoe or photo storage boxes.
D. On my computer’s hard drive.
E. Still in the film canisters or memory cards!
F. One word: Rubbermaid
- How do you most often display keepsake pictures?
A. In photo-safe albums or scrapbooks.
B. In picture frames.
C. Bulletin board or reminder board.
D. Rotating screensaver.
E. Does the refrigerator count?
- If you had all the pictures already collected and organized for it, which subject or event would you be most likely to preserve right now?
A. Birth of a child, wedding, vacation or family reunion.
B. Life of a family member or close friend who has passed away.
C. Holidays (Easter, Hanukkah, Halloween, 4th of July, etc.).
D. Yearbook (all the happenings of one calendar year).
E. Charity, not-for-profit or societal work
F. Random, candid shots of passersby
- What is the primary roadblock to preserving your memories?
A. My photos are not organized.
B. It's too expensive.
C. Can't find the time.
D. Don't have any space.
E. I'm not very creative.
F. I'm not sure where to start.
G. I'm not that interested.
- What type of preservation project would suit you most?
A. Crafty – Crop photos, journal, add memorabilia, embellish.
B. Traditional – Slide pix into pockets or add to pre-designed pages
C. Quick and Easy – Drag/drop pictures; click to add graphics
D. Pay-Per-Project – Hire a professional
E. Family Leavings – Let kids/grandkids sort through pictures
If you chose mostly A or B:
Page Stager/Paper Junkie. You are drawn to the craft store like a moth to a light. Desks and tables in your home resemble the aftermath of an elementary school art class. You frequently carry more luggage to a scrapbooking event than you do to the airport. You appreciate anything handmade, but often sacrifice sleep to achieve the extraordinary. You prefer to print your pictures but have recently turned to sharing them online via e-mail and photo sharing sites. You opt to traditionally scrapbook pages that involve memorabilia, but digital page prints have appeal. Prioritize events and focus on the most important ones first. Consider using the Power Layouts Kit to outline pages that need chronicling. For containing and transporting large stashes, Memory Mate Totes are a paper junkies’ dream.
If you chose mostly B or C:
Drive-thru Scrapbooker. You understand the value of preservation but you feel overwhelmed by the commitment and don’t always have extra time or space to amass the stash of a paper junkie. You recently switched to digital photography but still often get your pictures printed through a photo processing center or print them at home. A photo-safe storage system (such as Power Sort) would help you organize pictures/memorabilia while saving time. Quick kits and PicFolio Albums would help you achieve your goals without sacrificing creativity or time.
If you chose mostly C or D:
Graphic Minimalist. Your lifestyle is one of simplicity, and you rarely hang onto mementos or purchase souvenirs. You enjoy digital photography and dapple in graphic design but you wouldn’t win any prizes for having the most printed photos. You’re constantly on the go, and your laptop has become an extension of your person. Digital storybook creator software would enable you to create page prints, hard- and softcover storybooks or all-photo portfolios while staying mobile.
If you chose mostly D - F:
Storyteller. You wish to experience life with your own eyes and rarely from behind a lens. The photos you do have are a hodgepodge of different events and decades. Recount your memories in detail to eager listeners. Consider writing a blog or making an audio or video diary. Ask a family member or close friend to help you sort, organize and preserve photos for future generations. A photo-safe storage system (such as Power Sort) would help you organize pictures. A photo-labeling pencil can help you record details on the back of pictures without deteriorating them.
If your choices seem random:
You thrive on spontaneity and new experiences. You often do well at anything you try. You are not content sitting still. Try the Storybook Creator 2.0 software free to see if you like it. Consider attending an upcoming crop to learn more or contact your Creative Memories consultant with inquiries.
If your choices are split evenly between two personality types:
Split personality? Consider both personalities in your quest to preserve your memories, ancestry and biography.
*This is not a scientific quiz.
Monday, May 25, 2009
Turning Tricks Part 1
I’ve loaded most of the pages onto Picasa, but selected these few because they illustrate some tips and tricks I wanted to share.
Trick #1 – Make an all-journaling page interesting
This page started off as a ruled canvas. Even though the layout has been done for months, I just populated it with journaling this afternoon. I can hear you all groaning. Journaling can be a challenge, and some of you may be thinking an entire page with just writing, yea right. Before you blow off the idea entirely, how many of you spent 15 – 45 minutes recounting a story or anecdote about an event or day in your life to a friend or family member over the phone or in person? I’d be willing to bet a lot. There isn’t much difference in verbally telling a story and writing it down. Your journaling doesn’t have to be eloquent nor qualify for the Nobel Prize nor does it even have to be grammatically correct (gasp!). Yes, that’s right, I am actually encouraging – no endorsing – writing the way you speak. It’s you on paper, and that’s what preserving memories is all about. If you don’t trust yourself to write it in your perfect way the first time, then write it out on another piece of paper or type it beforehand. Put your journaling down first, then develop the rest of the page around it.
For this page, which is the story of how Adam and I met, I typed out the details first. I kind of had to do it this way because I previously laid out the page. I feigned writing the first line onto the black ruled paper by writing in the air just over the paper (hoverpen!) to gauge how much would fit on the first line. I counted the characters including spaces, and concluded that I could fit one full line from the typed text to one full line on the page. However, I had more typed lines than page lines. I began to edit my text for unnecessary words and phrases – or phrases that really didn’t contribute much to the telling of the story. Then, I began writing with the silver metallic pen, editing as I went along. Fortunately, I had enough lines for the words.
I know what your next question is: Isn’t an all-journaling page kind of droll? There are two answers to that question. Yes, to you it may seem kind of dreary con weary because you want to see pictures, mon! But stop for a minute. Imagine what it will be like for your great-great grandchildren to read this witty, insightful passage into your world. It will NOT be dreary con weary for them, I can assure you. They’ll run their fingers over your old, clumsily written words, and feel they are peering through a window beyond which you are the view. Ok, did you get tingles? Because I did!
Ok, now that I’m over that, I didn’t just mean how to make an all-journaling page interesting to read. I also meant how to make it interesting to see. One way to do this is to find a sheet of background paper with a noisy pattern. Place the journaling block over it, so that part of the paper peaks out at the top and bottom. Add a vellum accent to the page (like a callout) to help attract those coveted eyes. Use an eye-popping color of fine-tip ink to makes those same eyes do a double-take.
Trick #2 - Be the next design star with your layout
Sometimes, just putting this here and that there can be kind of drab, right? Background paper, few pictures, journaling box, embellishment. Background paper, few pictures, journaling box, embelli … zzzzppp ….
Rejuvenate your album by creating an entire room or object in which your pictures or memorabilia are merely props. Here are a couple of examples:
I had some memorabilia from a production of Hair I saw at Playhouse on the Square in Memphis in October 2001 that I wanted to incorporate on page two of a two-page spread. These included the playbill, my ticket and a fold-out poster of the 2001 – 2002 Playhouse on the Square season. In my stash, I had the sticker border of people occupying theatre seats facing forward as if they were watching a show. I decided to prop up the playbill and poster within a large memorabilia pocket as if they were on a stage. I placed a full sheet of light gray card stock in the background. Then, with my trusty pencil I etched out the dimensions of the stage on dark gray and red cardstock. I trimmed the red into a rectangle with the 12-inch straight trimmer and the dark gray in strips with an angle at the bottom to give the stage depth. Then, I adhered the memorabilia pocket onto the stage, inserted the memorabilia, and embellished with the ticket and two comedy and tragedy stickers (donated by Kathy H.). My final touch was to clip the playbill down on the right so when the page is turned in my book, the playbill won't slip to the left. Ta-da!
To further trim the tree, I punched white, french vanilla and cranberry circles with the circle maker and mini circle maker. I pieced the white and french vanilla together with frosted splits to make little popcorn and alternated the popcorn with the cranberries to make a primitive-style garland. I added a few sticker ornaments from my stash, and using the same oval patterns cut strips to fit around the picture ornaments for captions.
Trick #3 – Mix it up with a split page
Have you ever had multiple good shots of the same subject but not sure what to do with them? Looking for a unique way to create an intro page or title page? Try your hand at this little twist.
Mark a regular refill page (in my case their 12 x 12) at the centermost point. Be sure to include the reinforced edges in the measurement. Trim the page at the mark with the 12-inch straight trimmer. Add tape runner to one side of one of the halves then place the other half over top and press together. Be sure the page loops are on one side and the curved reinforced edge is on the other. You can protect the page by trimming a page protector in half. Now you have a cute double-sided insert!
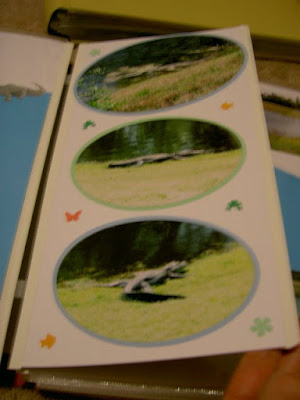
These are extra pictures of alligators we took when we went to visit my grandparents at their home in Wildwood, Florida in 2002. Using the custom cutting system oval patterns and blades, I cut all but one picture into an oval shape and also cut a background for each. Then, using the meadow micro maker, I punched shapes of a frog, fish, butterfly and flower to embellish.
During the same trip, we visited Epcot Center. I had quite a few pictures for this side trip, so I wanted to create an interesting intro. I professionally cut the letters to spell E-p-c-o-t. I also selected an image from my library that resembled the Spaceship Earth. I cut the foreground in gray card stock and the background in brick card stock. I placed one picture on this side of the split. On the reverse side of the split, I used a few random shots that identified Disney and Epcot Center. I charged two of the pictures with aquamarine photo mats and added a strip of mediterranean card stock to the left.
Look for Turning Tricks Part 2 within the next few months!
Sunday, March 29, 2009
The One-Minute, Weekend Scrapbooker
- If you have an eat-in kitchen and it won't disrupt your routine much, convert your dining room into a temporary workspace.
- During mild, dry weather, push some of those garage tchotchkes to the side (preferrably near the trash can so someone mistakes them for garbage - ever notice that "garage" and "garbage" are near-homonyms?).
- Have a sparse, unused/unfinished basement? During warm or hot or humid months, open a folding table and chairs down there and escape to your self-made retreat.
- Convert an unused bedroom to an office and designate one area/corner to your projects.
You may only steal one minute here or 15 minutes there, but those minutes eventually add up to a completed page and those completed pages eventually add up to completed albums. Staying as organized as possible will help you maximize this time. Soldier on. Warrior on. You can do it!
While Kanye West performs on AI, I try to organize and re-orient myself to all things Biltmore. I already fired up my new photo printer to spit out a photo of the grand staircase chandelier for a previous layout. I also made a few journaling boxes and embellishments from remnants of a Jewel Power Palette Addition 4th of July. I'm going to try to squeeze in 3 - 4 photos on this page of the 4th floor in Biltmore House: Servants' bedrooms, servants' hall, and observatory. First step is to journal in MS Word (any word processing software will do) and print it out on vellum as well as print photos.
AI update: Jorge goes home, but his departure isn't much of a surprise, either.
At 10 pm, I decide to stop for the night. After all, I do have a full time job to rest up for!
[Sunday, March 15, 2009]
Yesterday, I had the pleasure of attending Cropapalooza in the GREEN in Essex. If you haven't been to one of these crops, you are missing out on a fantastic time. These crops offer ample space, time, food and energy for working on projects. The hosts' tag line is "12-hours of non-stop crop." There are free giveaways and a page layout contest. The next one is scheduled for May 2 with the 80s as the theme. If interested in attending, ask me for details or visit the event listing on Facebook.
As I continue working on the Biltmore scrapbook, it's a typical Sunday afternoon. I am donning warrior garb. Adam's at work, and Summer went down for her nap without a fight. The steady tap of the rain temps me to join her in slumber, but I try to stay focused. I just finished some record-keeping and follow-up work from yesterday's Cropapalooza. I devote the final minutes before Summer wakes up to resume work on the Biltmore scrapbook. Remember, slow and easy wins the race. Just how long have I been working on this? 1.5 years, I think. Take heart. None of you could lollygag as much as me! Honestly, I should pen a book entitled The Weekend Scrapbooker. One thing's for sure, I seem to have overcome my inability to complete a project piecemeal! There's no excuse now for not writing that novel nor the aforementioned bit of nonfiction.
I digress. I print the appropriated images of the Biltmore House 4th floor rooms on the photo printer. The observatory photo didn't print well, even with a bit of touch-up. So, I elect to use images of both servants' bedrooms and the servants' hall on this page. (image 1)
Scrapbooking may not be as labor intensive as self-initiated home improvement projects, but once preserved, the memories will never deteriorate. What's more, I never need call an expert in to salvage a project, except save a cleaning expert! Thus, I'll continue these weekend jaunts into the past.
Saturday, February 14, 2009
RIP, VIP and TIPs from the WIP
[Sunday, August 24, 2008] (Nana, you've had a long birthday this year!)
These next two pages should be quick and easy: a two-page spread featuring Mr. & Mrs. Vanderbilt's bedrooms. Yes, they slept separately, not uncommon in that day but begs the questions (c'mon, you've wondered): did it make them more or less intimate? commune better? get uninterrupted sleep? If we are remotely curious about these things in heaven, perhaps we'll inquire.
I start with Edith's room. The rich, dark textures of her room scream for a light background (not to mention smacks of death), but I also don't want the layout to be too dull either. I find a sheet of beige cardstock (butter is too bright), which is muted butter. Then, I find a slant-lined purple pattern in my stash which coordinates splendidly. Just enough purple - neither over- nor understated. (image 1)
I also find the same patterned paper in green, so I use that on George's page. In this instance, its the pattern of the paper that unifies the layout, not the color, in addition to the portrait postcards. (image 2)
Summer is about to wake up, so I break for now.
[Wednesday, August 27, 2008, Crop Club]
Mom, Kathy and I are scrapping and watching America's Got Talent. Thus far, the talent is a bit lackluster. Jerry Springer live is a bit scary. Good reason to focus on my scrapbook. Picking up where I left off, with the straight trimmer, I cut some of the evergreen cardstock to charge the as-built on Mr. Vanderbilt's page and eggplant cardstock to charge the as-built on Mrs. V's page. I'll do the same for the vellum later. Now, I decide to use the tearing tool to tear each side of the beige cardstock to add texture.
During an AGT commercial break, we discuss Michael Phelps' .01 win against Cavic in the 100 fly. We heard that special cameras had been installed the night before, perhaps in anticipation of the tight race. Our pride as a nation was fueled all the more by the honorable way in which Phelps handled himself before, during and after each race. "Let the swimming speak for itself," he continually states. Not so for his competitors.
A lot competes for your attention if you maintain a large stash. The girls and I discuss the process of selecting the right embellishments. We concur that always sticking with the first discovery might cause us to overlook something better, so, if you find something, add it to your "lightbox" and continue searching. This same selection process applies to many things. I, for one, will scour all the XM radio stations for the best song, even if the best song was the first one I heard, and by the time I get back to it, it's over. I'm discontented to keep it on the first station without hearing what else is playing. In short, I like having options.
ER is entering its final season after 14 long years. Kathy and I have been faithful viewers. We hope George Clooney makes a cameo in one of the final episodes. I only hope it takes me less time to complete this scrapbook than ER has been broadcast!
I adhere everything with tape runner except vellum and Mr. V's portrait, including the torn paper. With the straight trimmer, I cut a small journaling box from the evergreen cardstock and with the gold metallic fine-tip pen, write a little of the description from Mr. V's portrait at the top, followed by a bit of narrative regarding the rest of the tour. Then, I adhere the postcard and journaling box with tape runner. I cut a small strip of evergreen cardstock to charge vellum, then adhere it with frosted splits. (image 3)
Mrs. V's page is very similar. I follow the same process as above using eggplant cardstock. (image 4) I add page protectors, and I'm done for the night, thankful I don't have to retire to Mrs. V's isolated death-adorned boudoir.
Title of this entry spelled out for you: Rest in Peace, Very Important Person and Tips from the Work in Progress. The 'Rest in Peace' bit is a bit cynical. It doesn't allude to Edith Vanderbilt's death, but instead to her sleeping quarters.
Subscribe via email
Subscribe To
Popular Posts
-
In September - October, I was very fortunate to be able to spend some time touring the United Kingdom and Ireland. Okay, you dragged it out ...
-
Merry Christmas and Happy New Year! Enjoy this year's riddle! I am the shape of Captain Hook's arm And a nostalgic Christmas c...
-
Over Veterans Day, Adam and I had the fortunate opportunity to spend a couple of days with Travis Bowman , good friend and a 6th generation...
About Me
- Heather Walls.
- I enjoy organizing and preserving papyrus treasures and digital photos. I'm a true blood paper junkie and love to paint with the often-overlooked produce of trees. What is your paper passion? I'd love to hear from you! Send me an e-mail at thebookstand@msn.com